Eurocopter Tiger Build
On behalf of the AHA and all our members, we would like to thank Lee for sharing his exciting Eurocopter Tiger build.
So it starts…
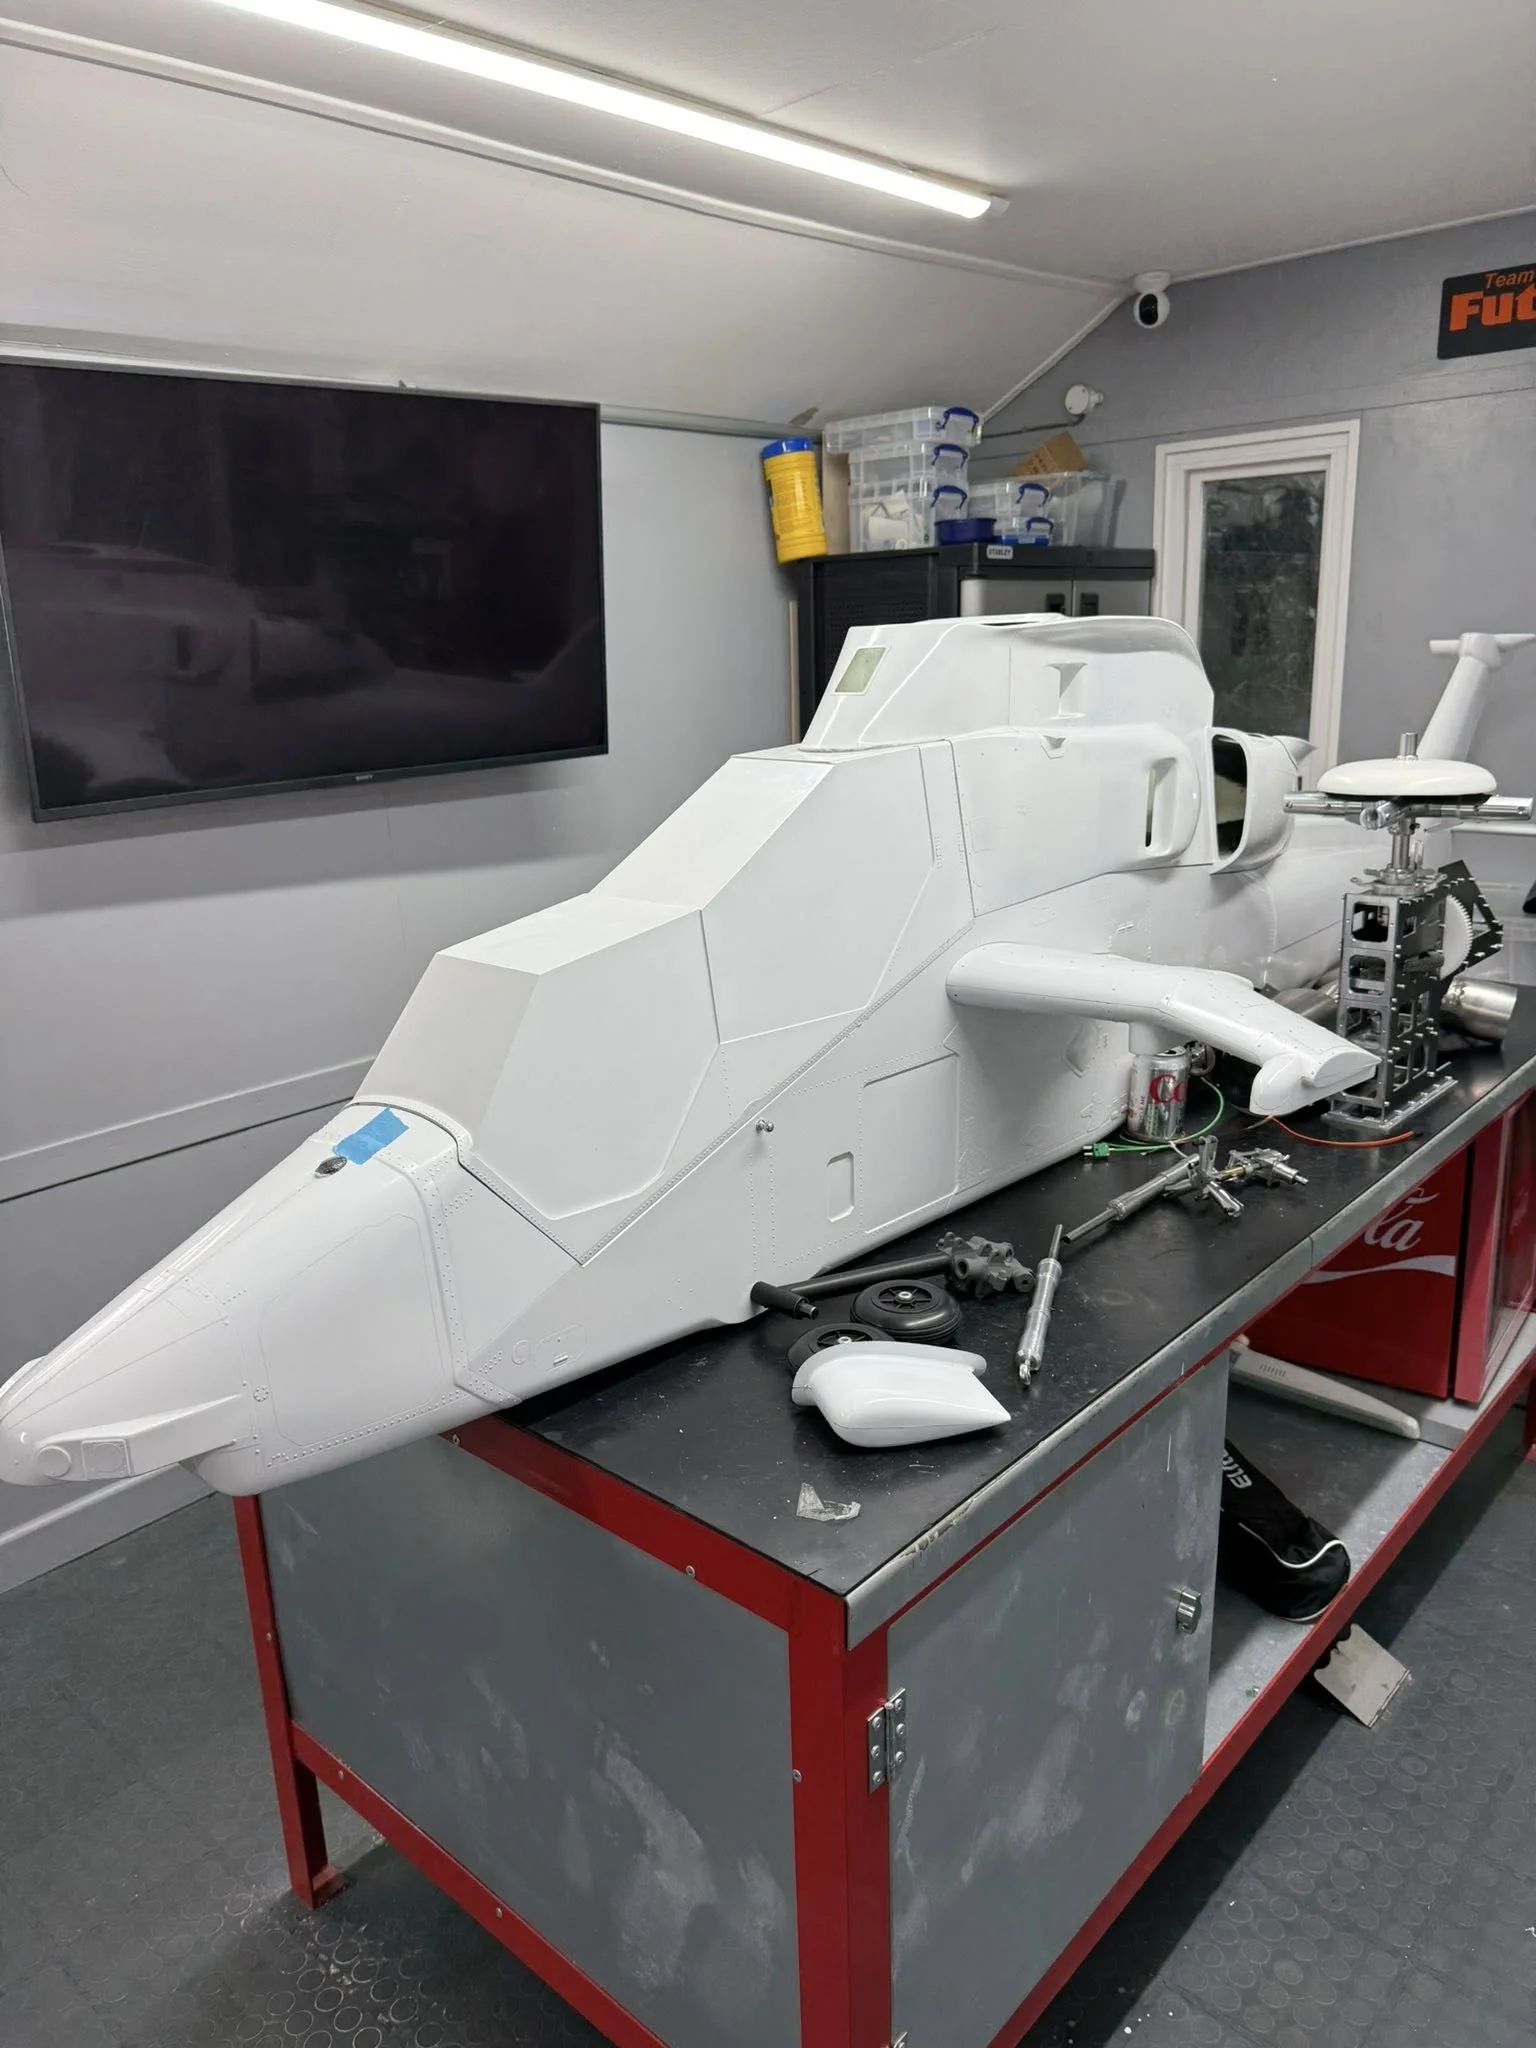
The Eurocopter Tiger. Everything laid out and looked at today. Next up, start cut-outs and rub down to get that shine off the gel coat. HPS-H701 Futaba servos on order for cyclic and tail. Worked out roughly where the flexi drive will route. Cheers Dennis Engel for some pics for positioning.
60% sanding complete. A very boring job and boring pics, but I like to get it out the way first and flat the seams back. Well worth the effort. Besides, adding scale detail adheres much better and it’s easier to draw location guides for parts and openings on a matte surface. Pleased with minimal pinholes around joins. Used a mix of 3M Scotch, red and grey, and 320g.
Stay tuned for another thrilling instalment ‘sanding part 2’, the 10ft bit.

1 March 2026
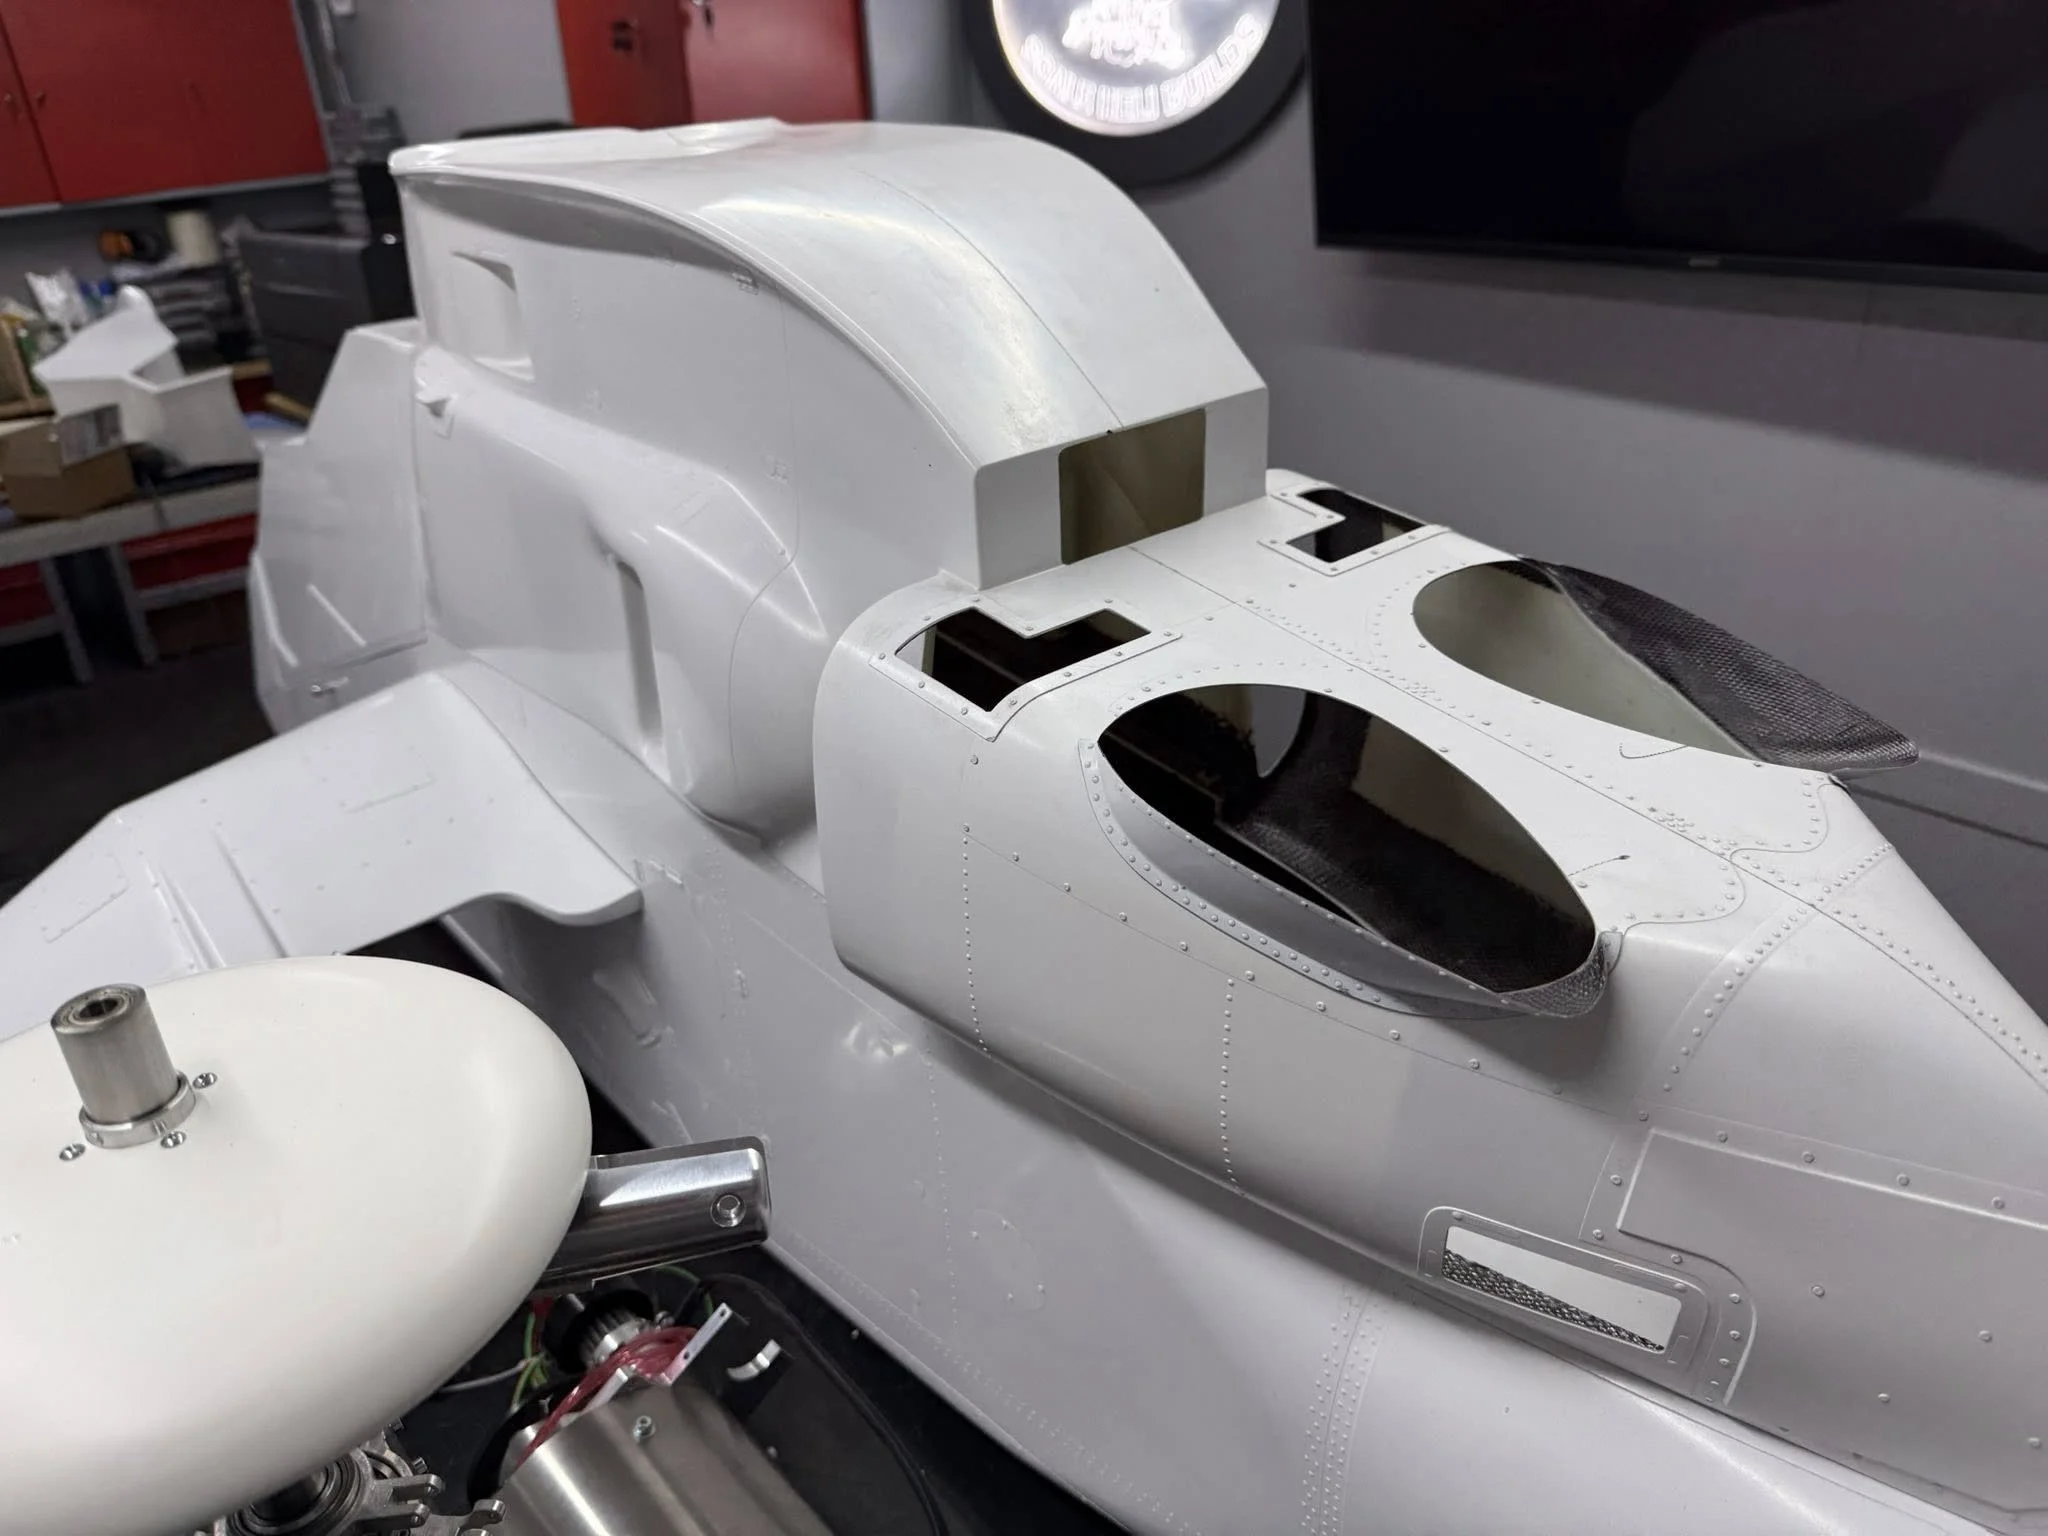
Eurocopter Tiger - the boredom of sanding continues. Just the large fuselage part to go. Anyway, this is the process in real time, not sped up in anyway. I got a lot done in a few minutes.
https://www.facebook.com/reel/1221769662724095
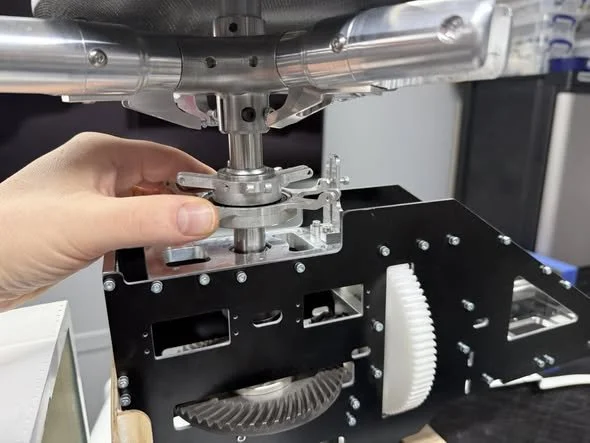
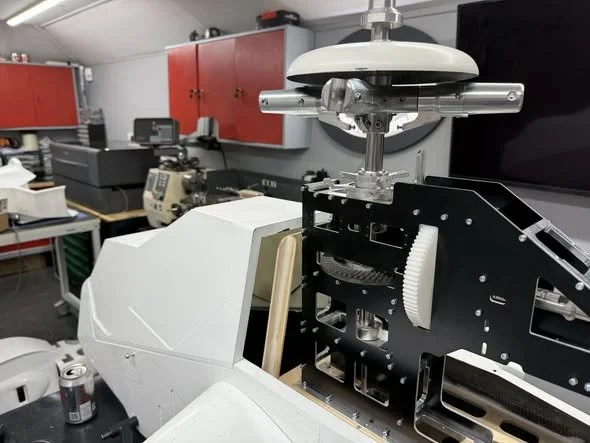
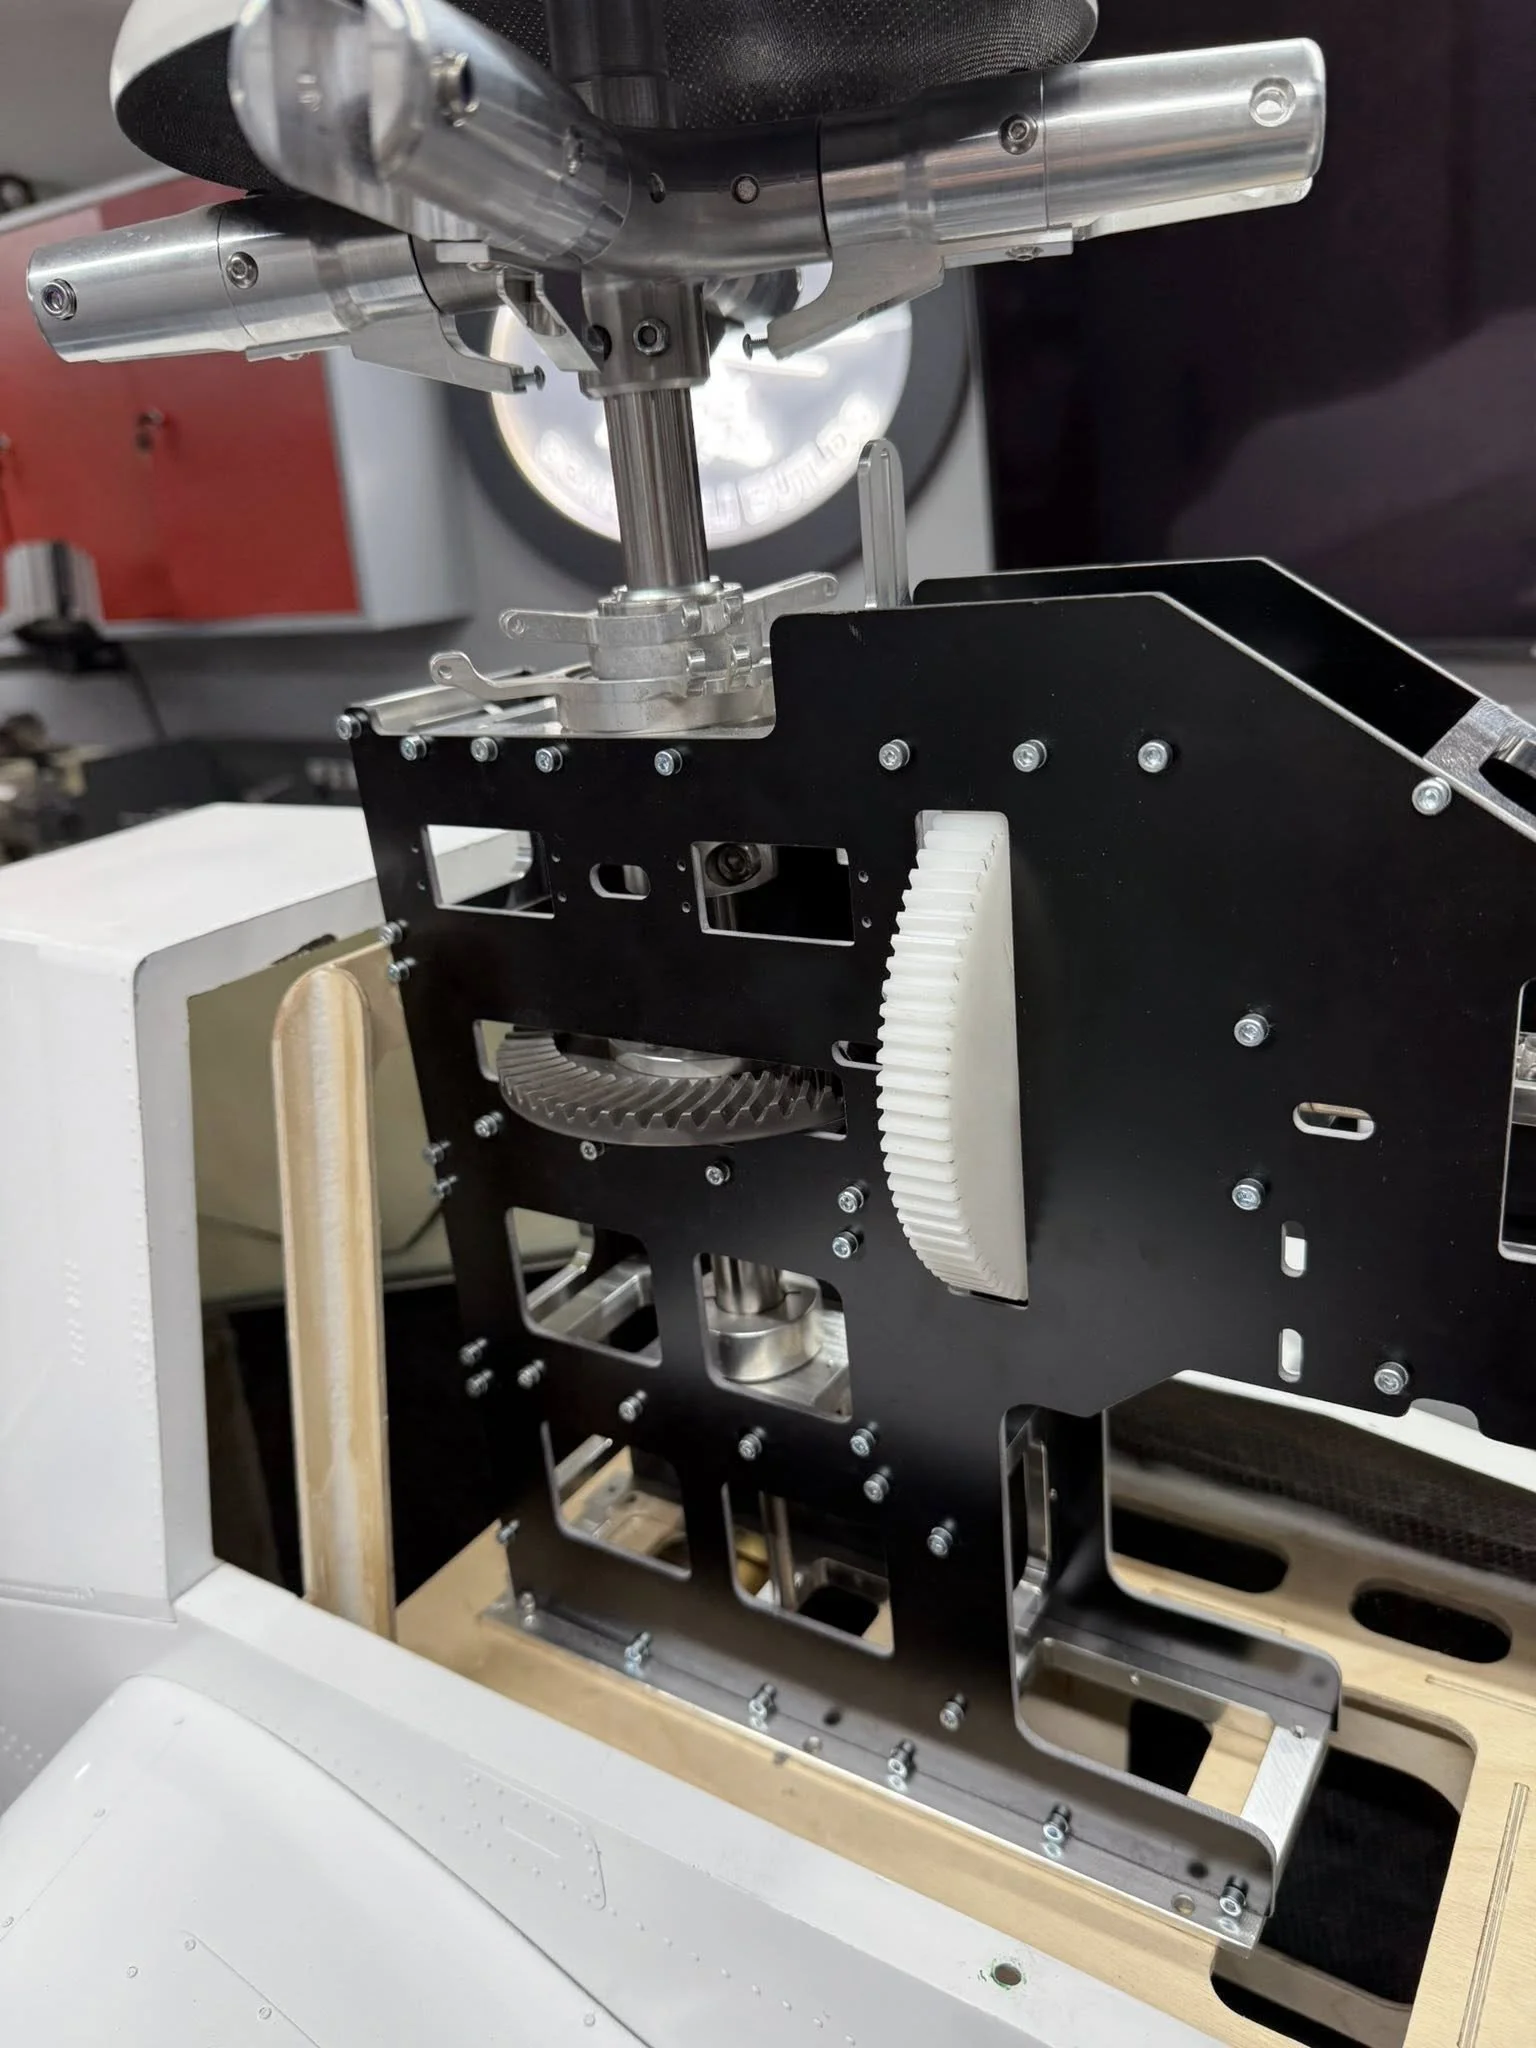
Eurocopter Tiger Osiris modifications. It isn’t my design but I’ve strengthened it and also modified it to provide elevation functionality. I’ve designed it to use a thin section 62 x 55 x 6mm bearing and a mini Savox 20kg servo. The dome cover opposite the radar dome will attach with four neodymium 4mm magnets so it can be removed to get to the servo. The whole mast mounts onto a metal hub that mounts onto the 20mm hollow mast.
It’s a fair size print comprised of four components. It’s currently printing on an Anycubic Mono M7 Max which will have it finished in two sessions.
3 March 2026
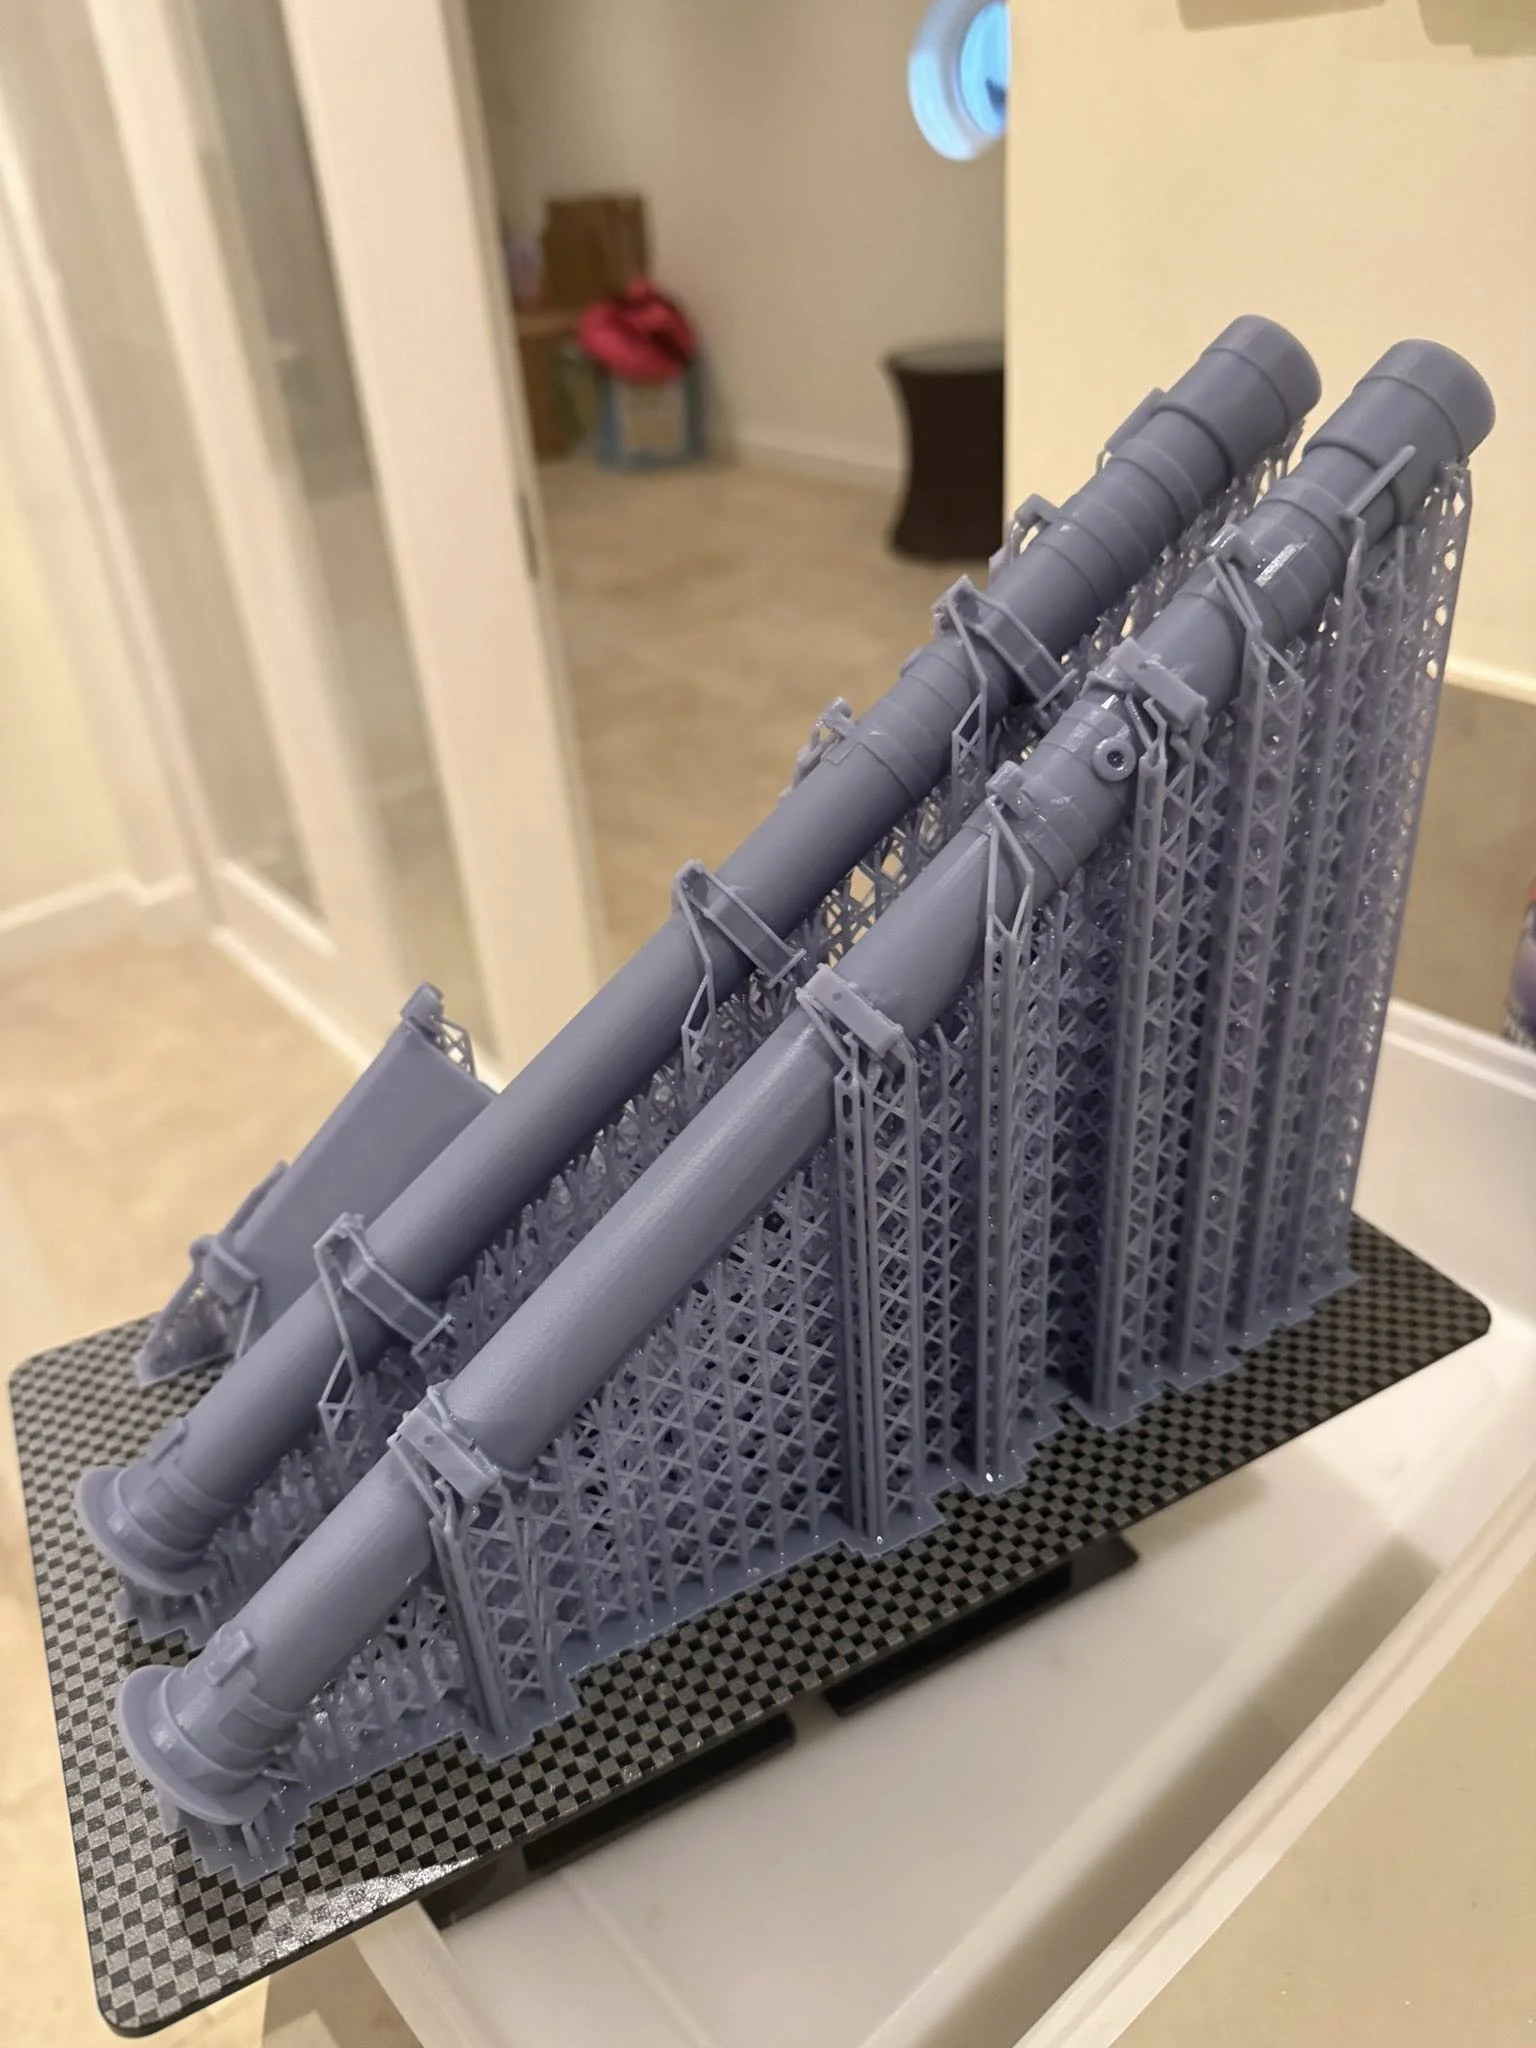
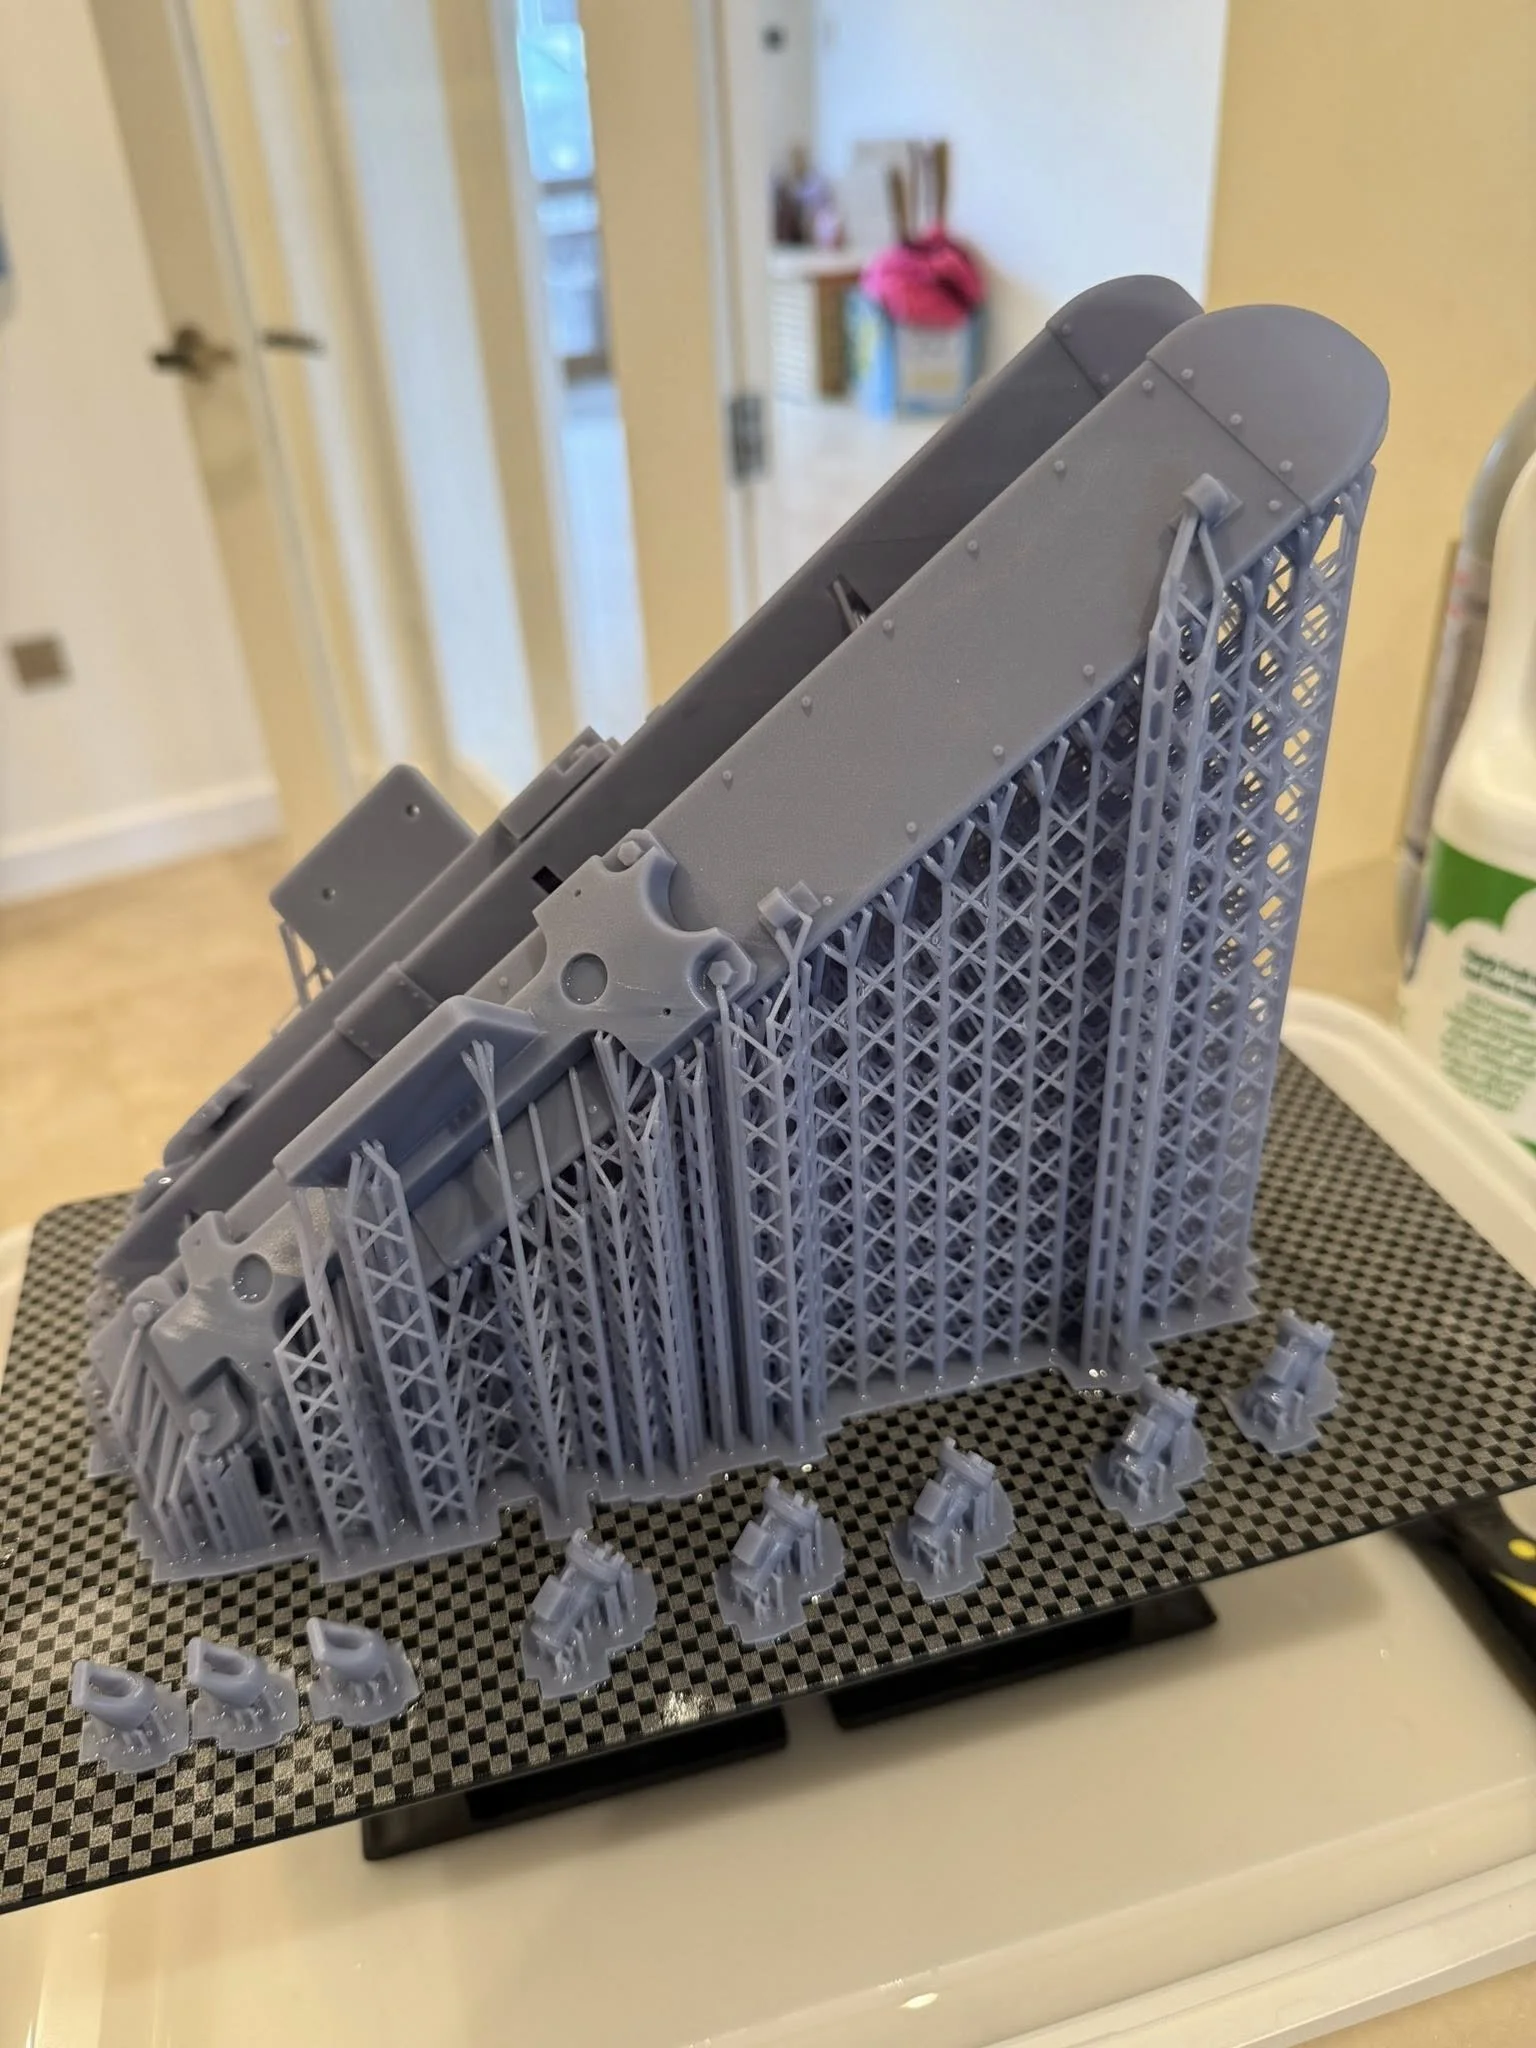
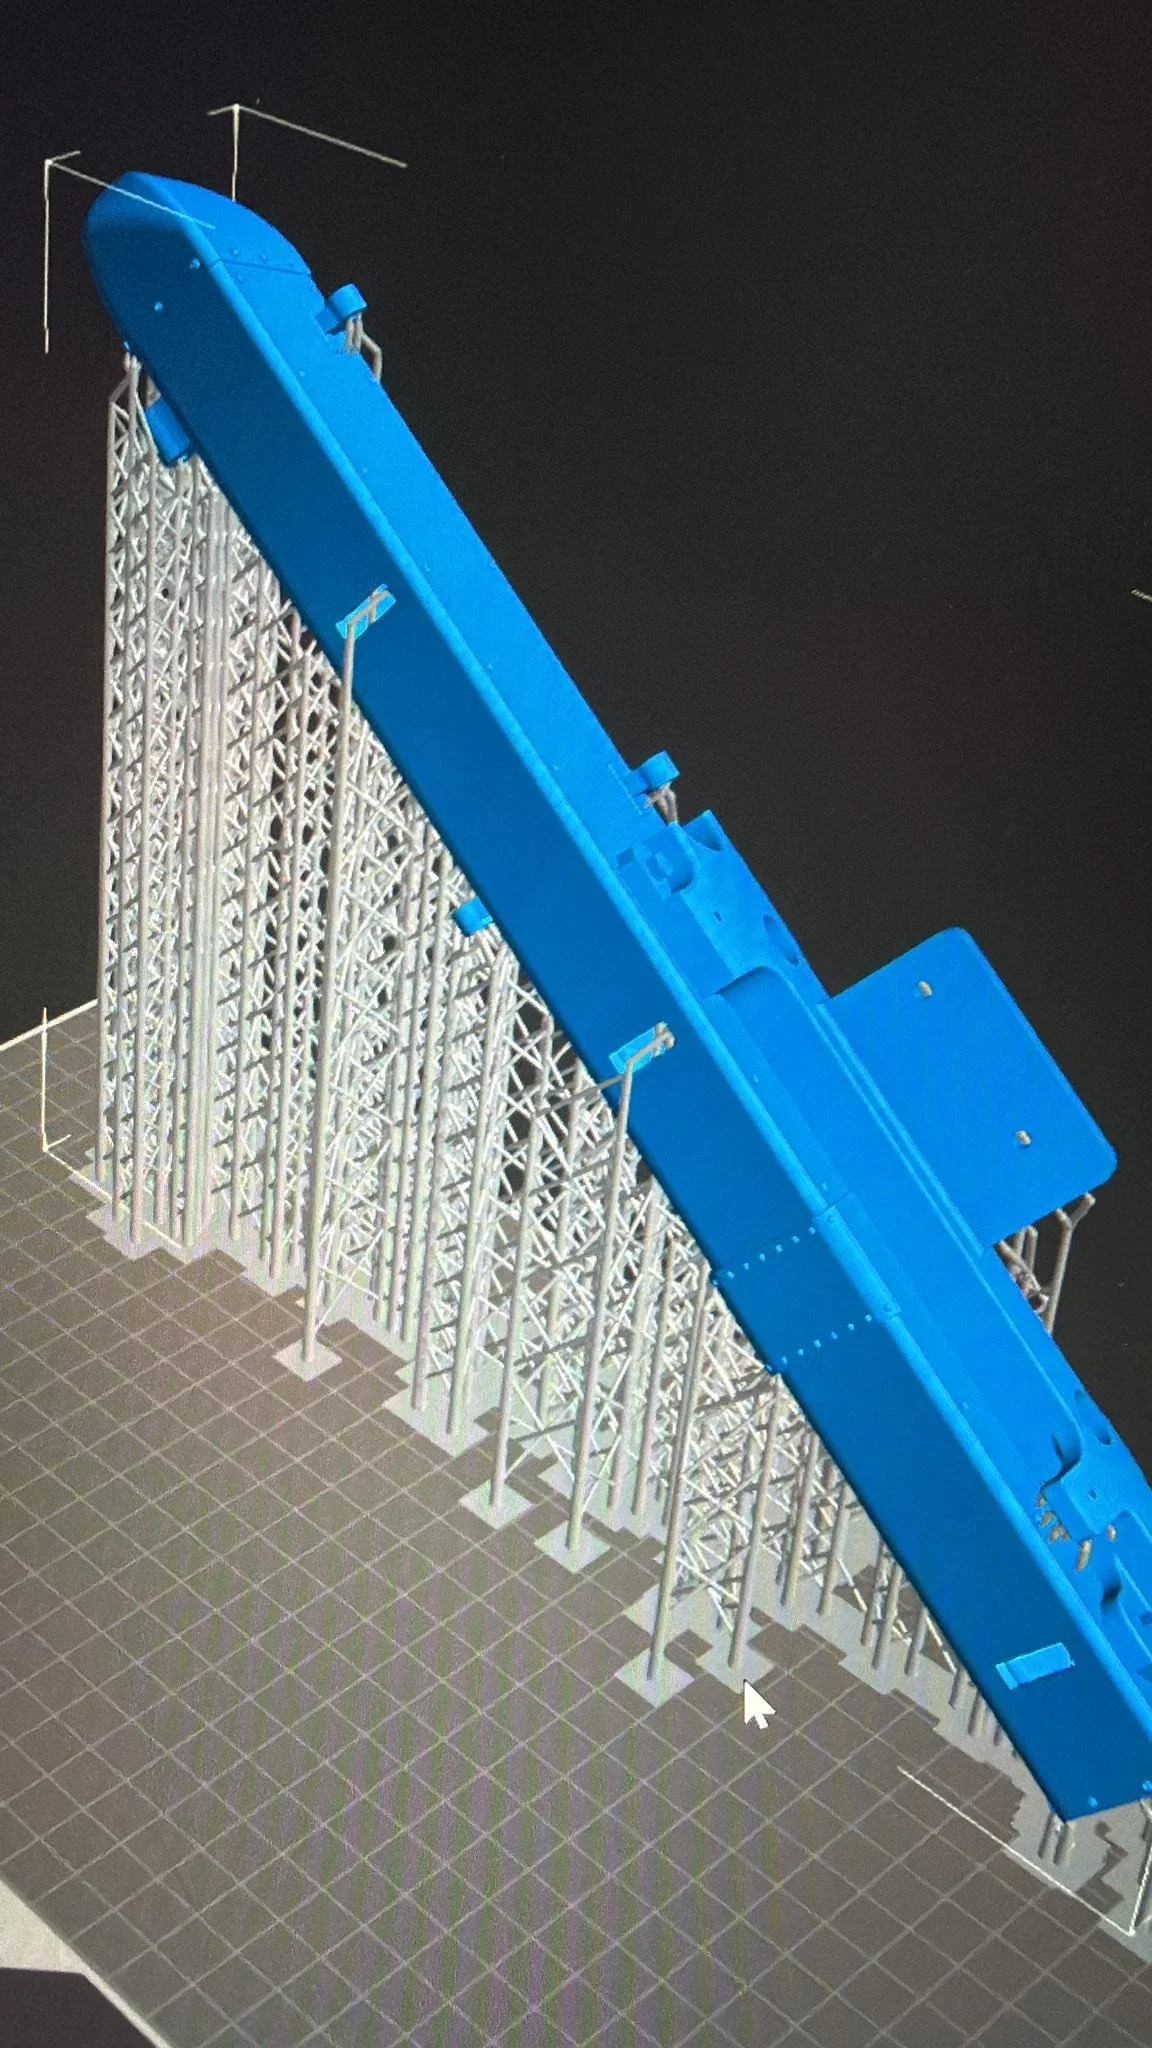
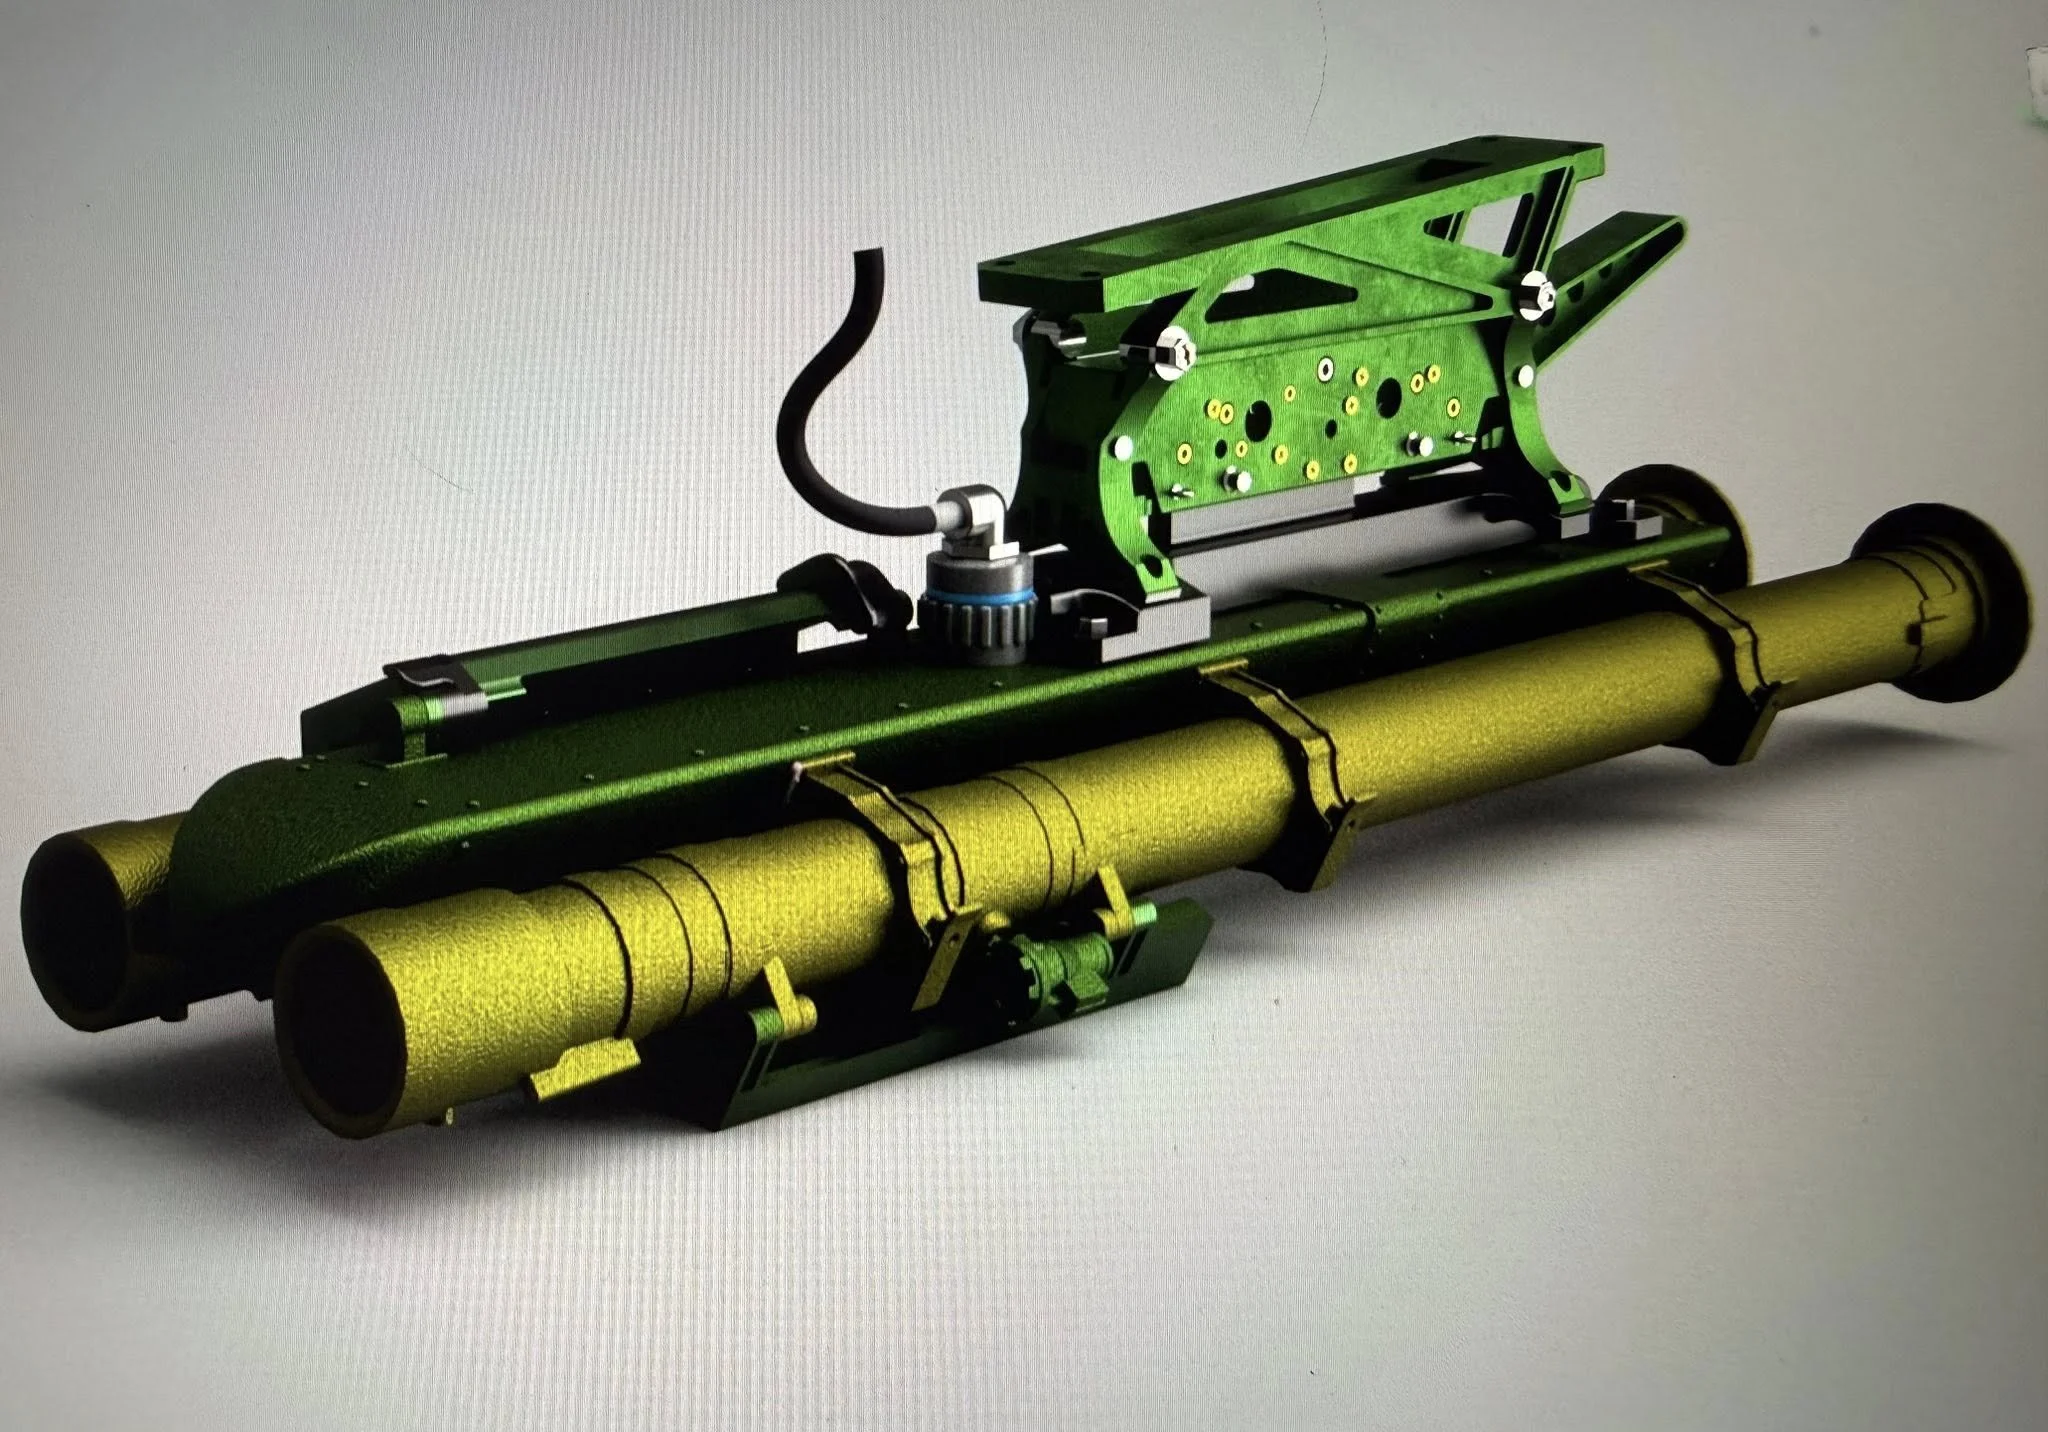
Decided to get all of the weapons designed for the Heli Factory Eurocopter Tiger. I’ve started rendering some of the designs I’ve worked on as it only takes a minute and looks good . Started with the AIM 92 Stinger rockets. These require the component parts printed in seven parts. The tubes are just over 300mm with the correct angle set inside the mount. The large HMP400 gun pod printed off great on the Anycubic M7 Max. Scales are exact as per specifications.
I find the canvas calibration so useful in Fusion 360


10th March 2026
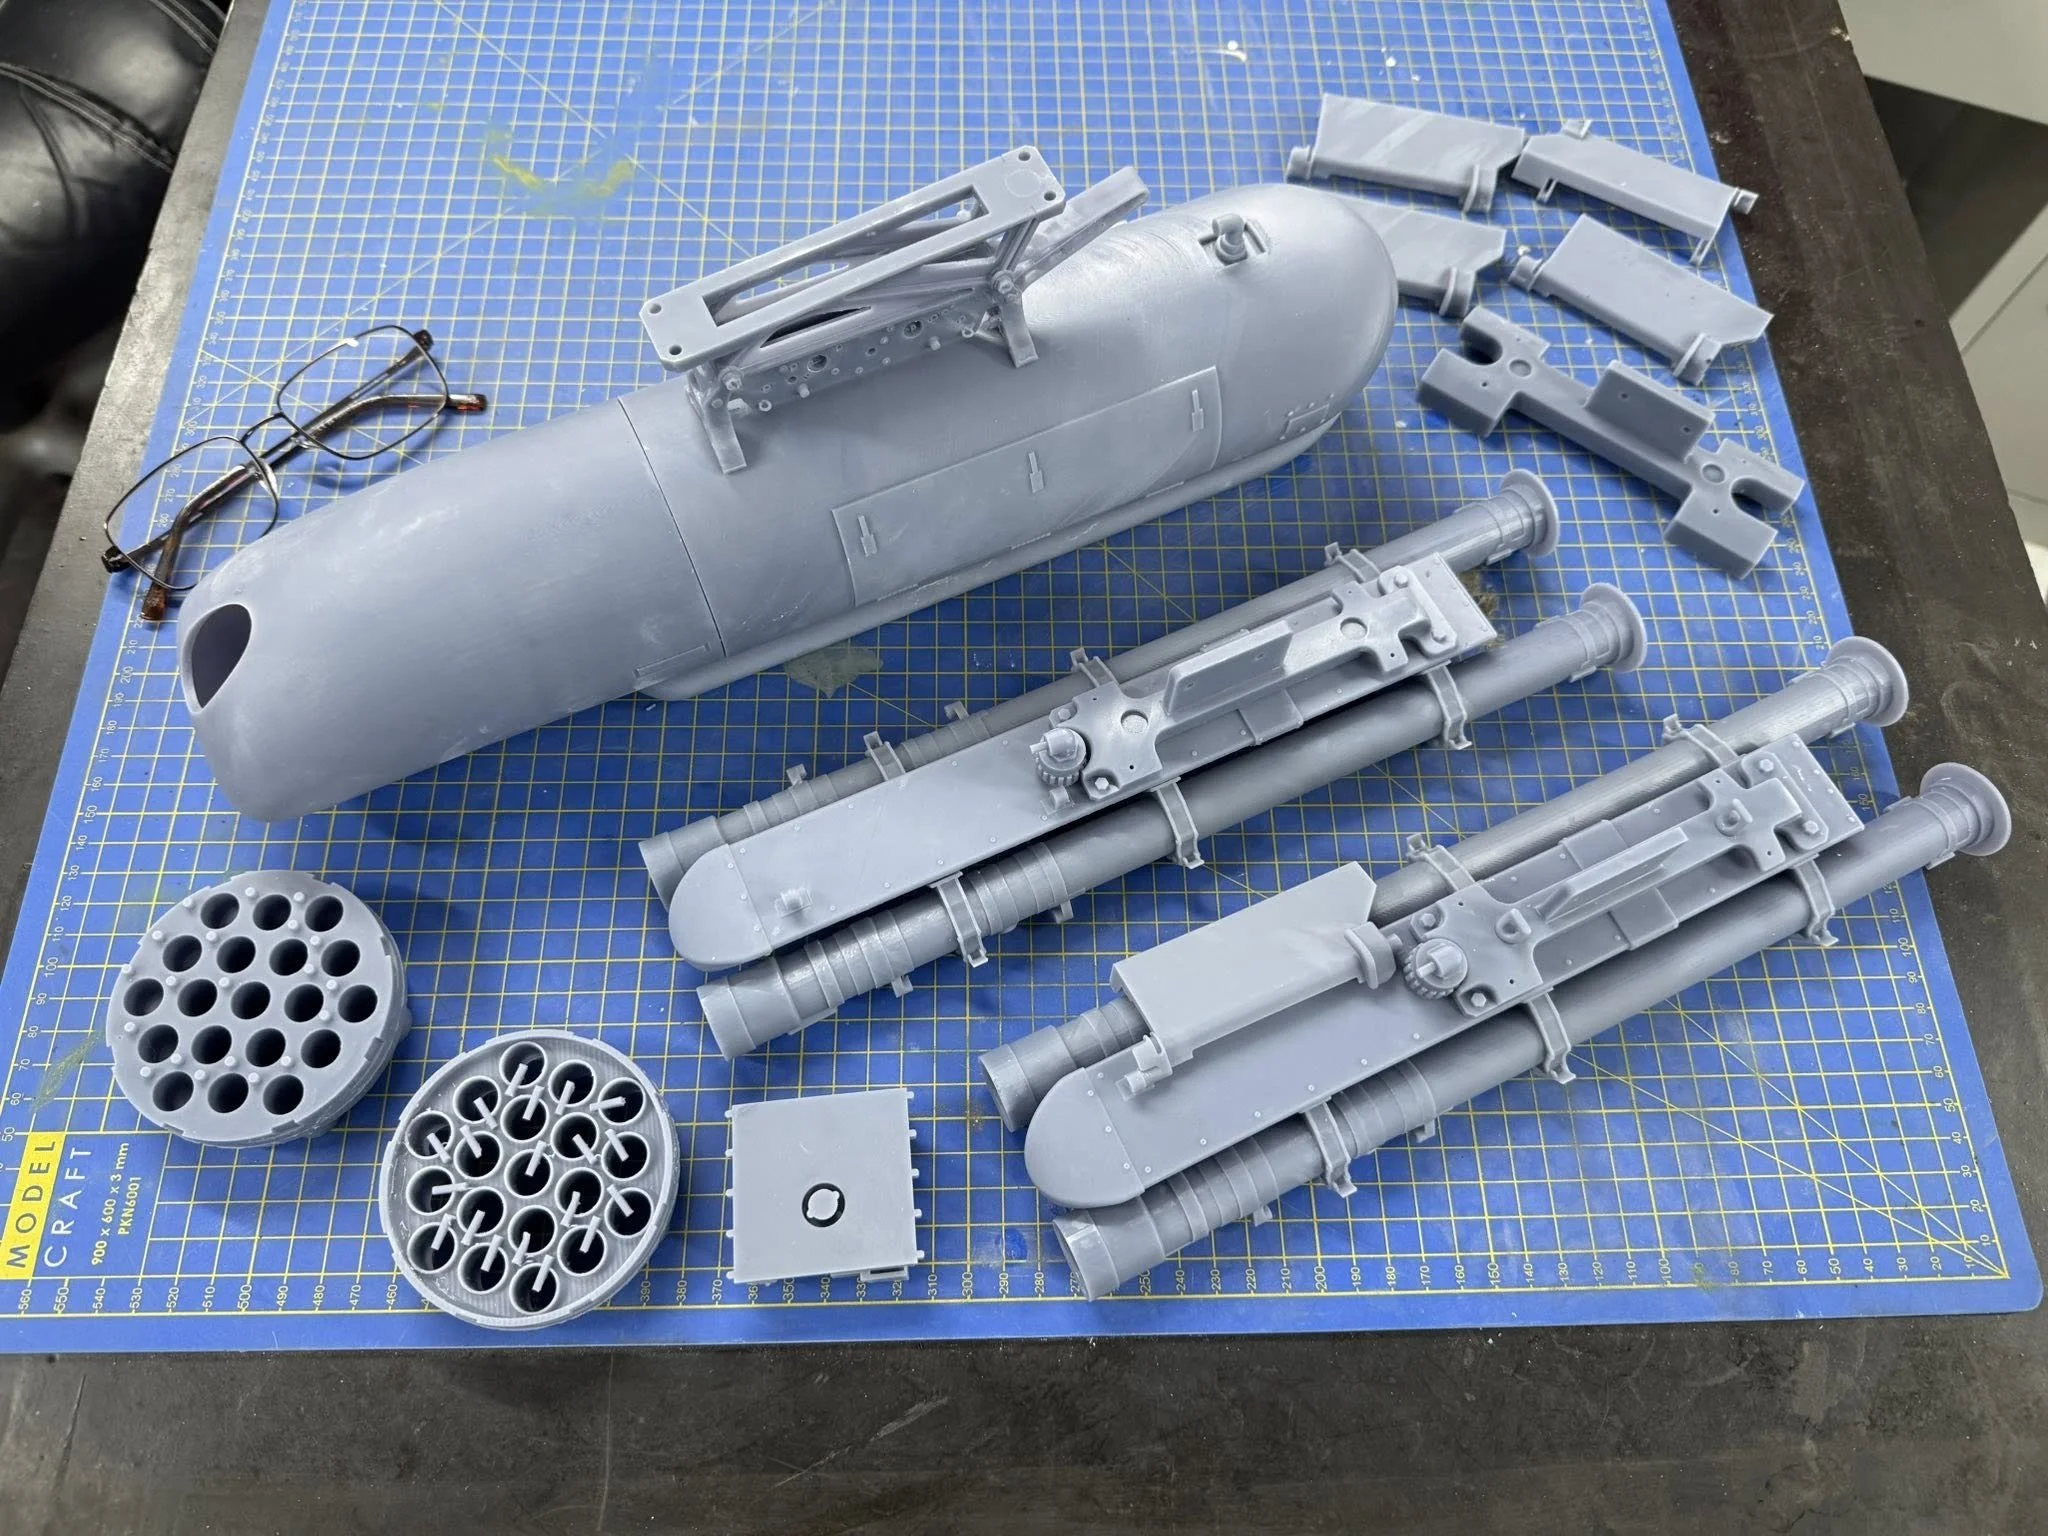
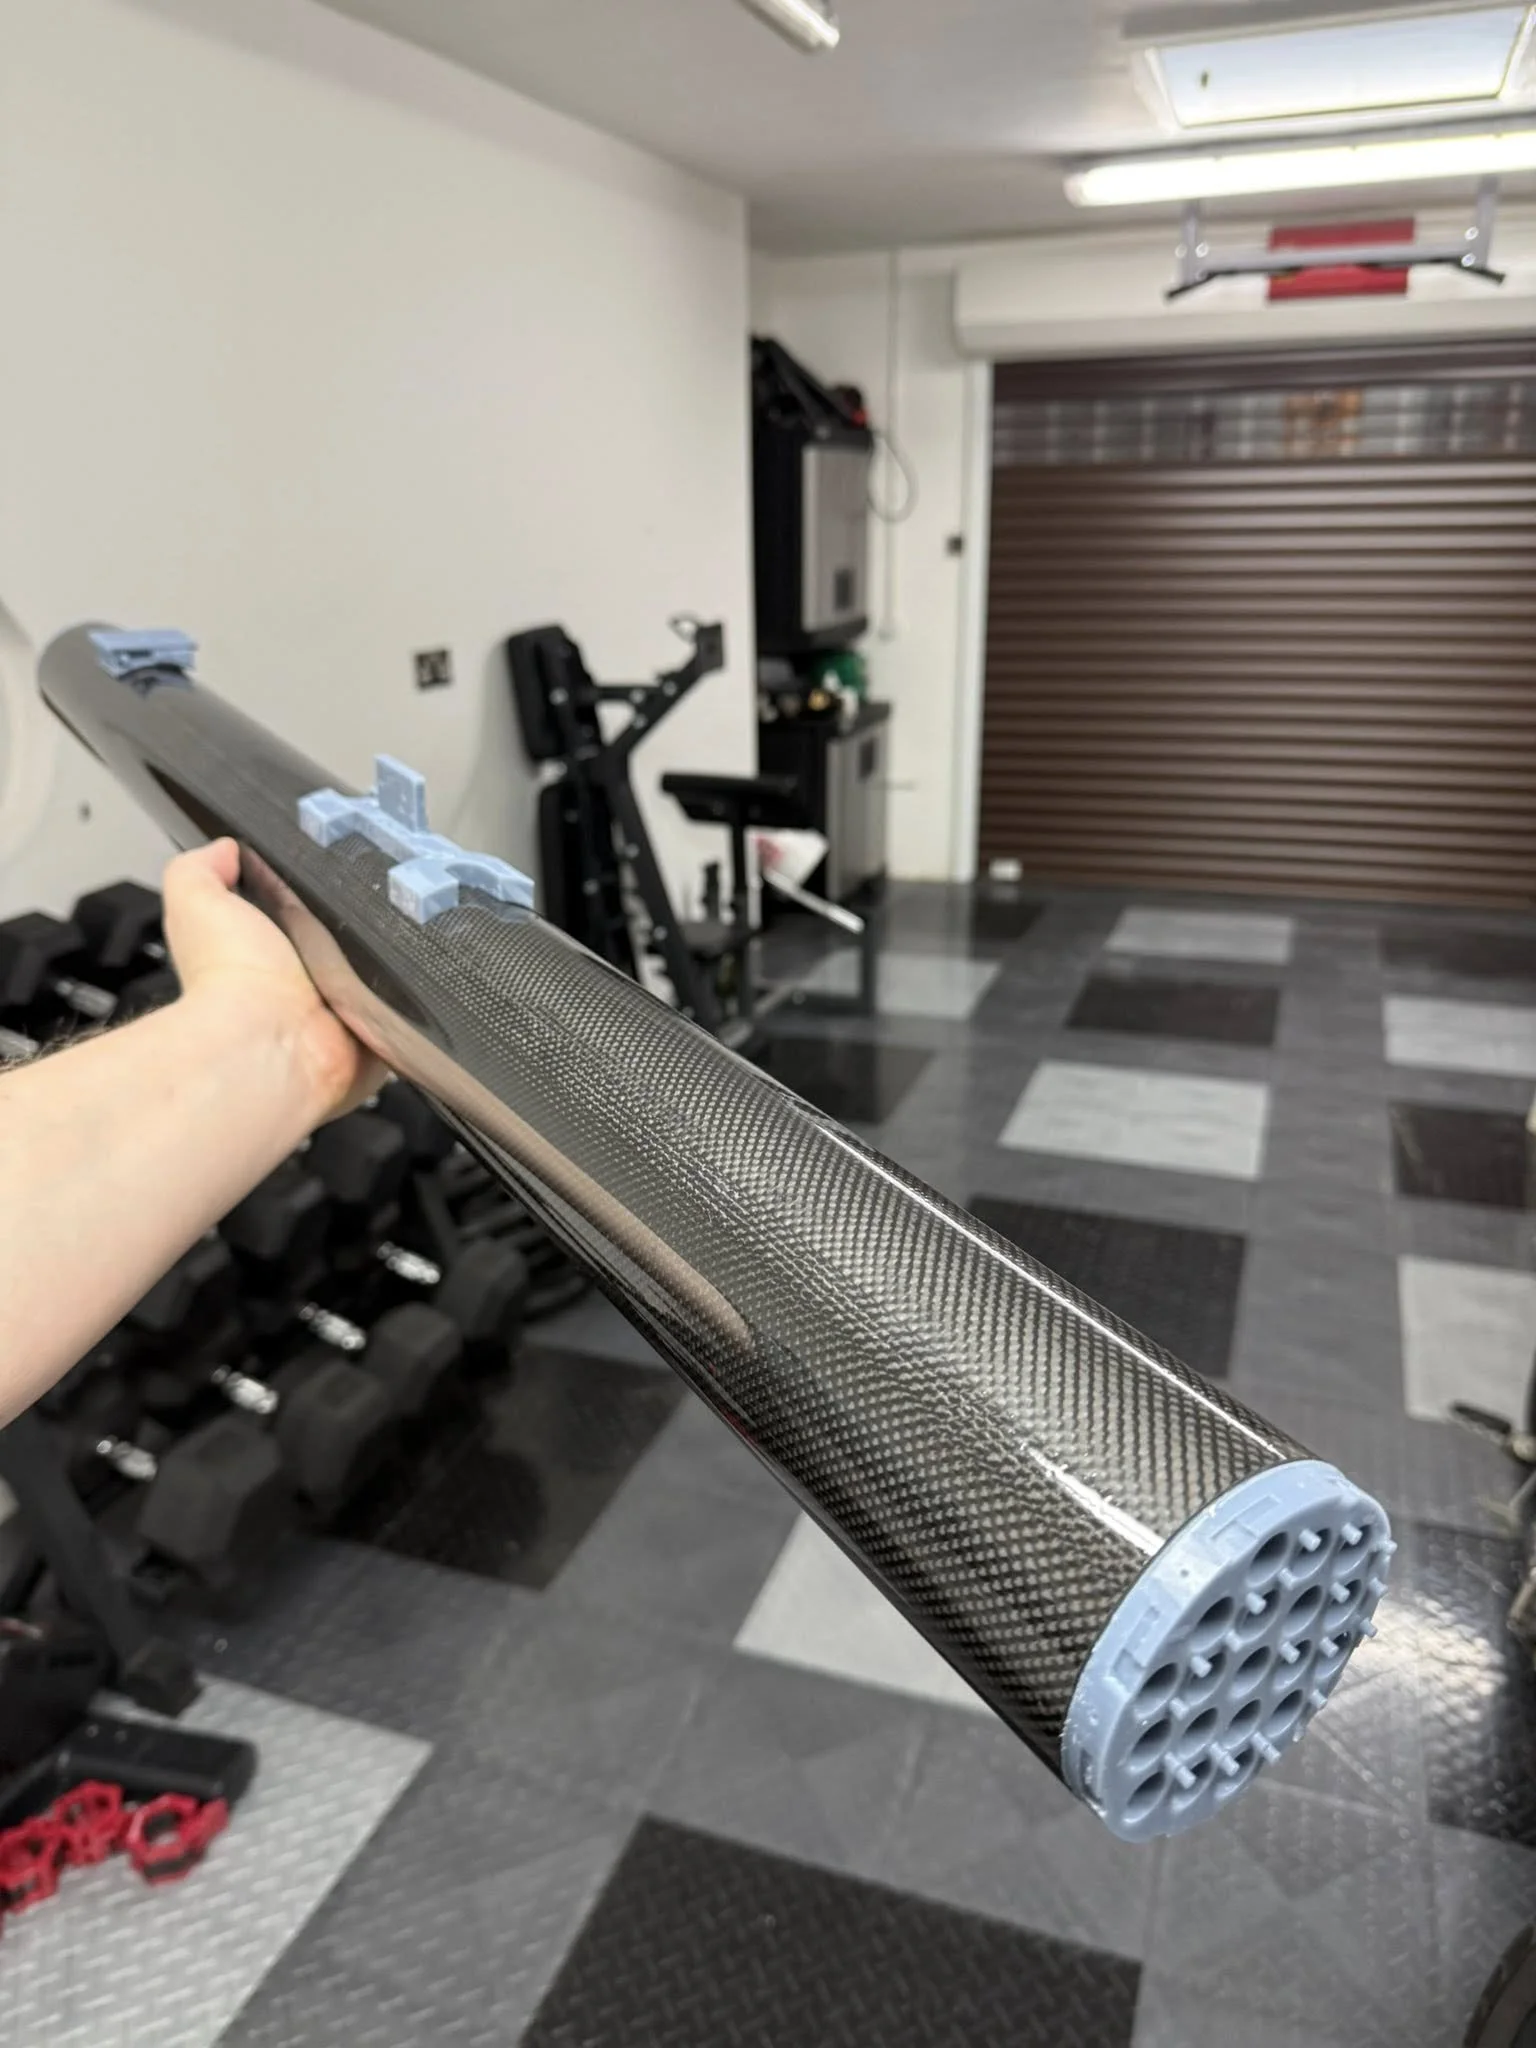
Towards the end of weapons designing and printing for the HF Eurocopter Tiger. Few bits still printing. The AIM92 stingers have 15mm carbon tube inserts to ensure they don’t warp. The FZ225 rocket launcher will be made from 80mm carbon tube. It also has 19 individual 0.5mm wall carbon tubes that will be inside running the length of the main cylinder. The gunpod is being reprinted to incorporate a strong attachment point. I’ll then be laser cutting ply formers with 4 x 3.75kg neodymium magnets so each weapons pylon can be pulled off from the wing for transport