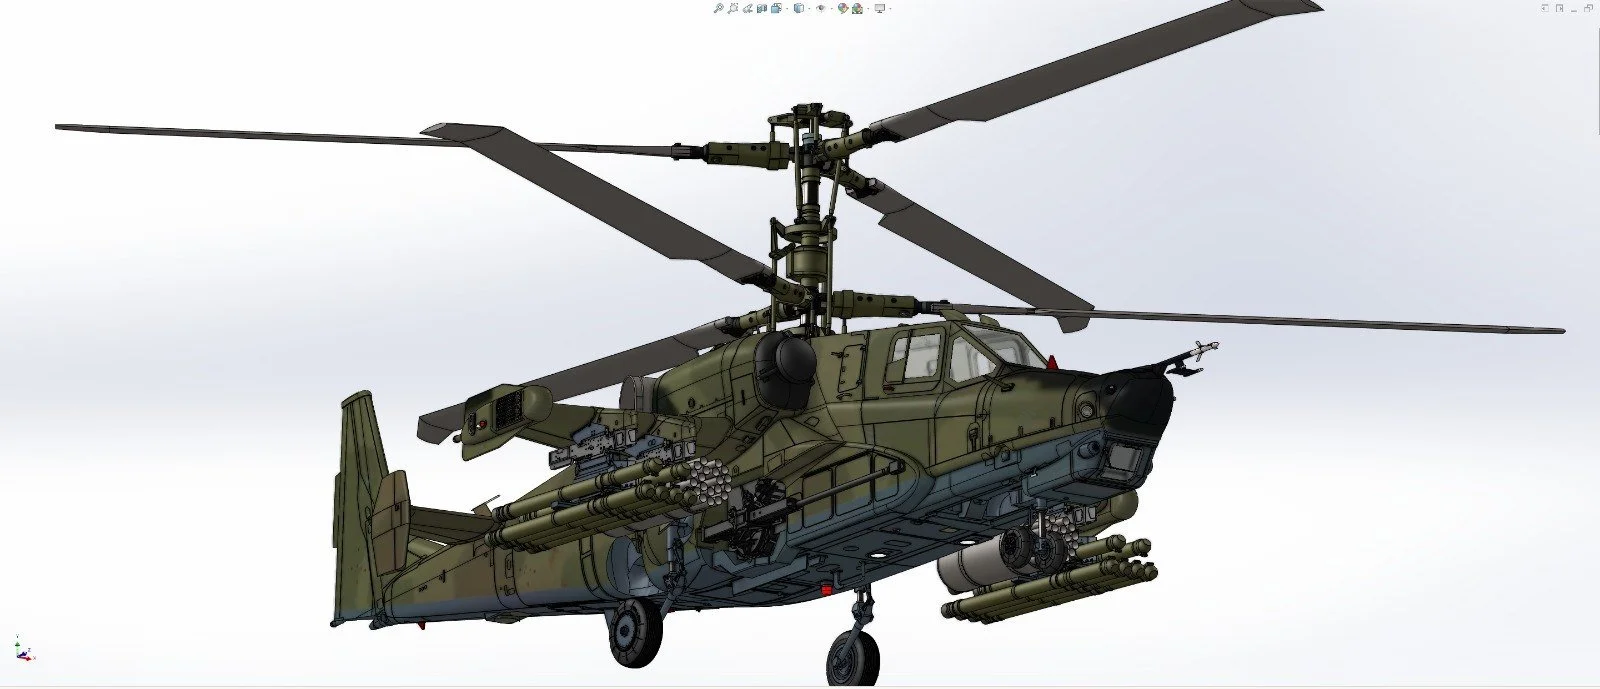
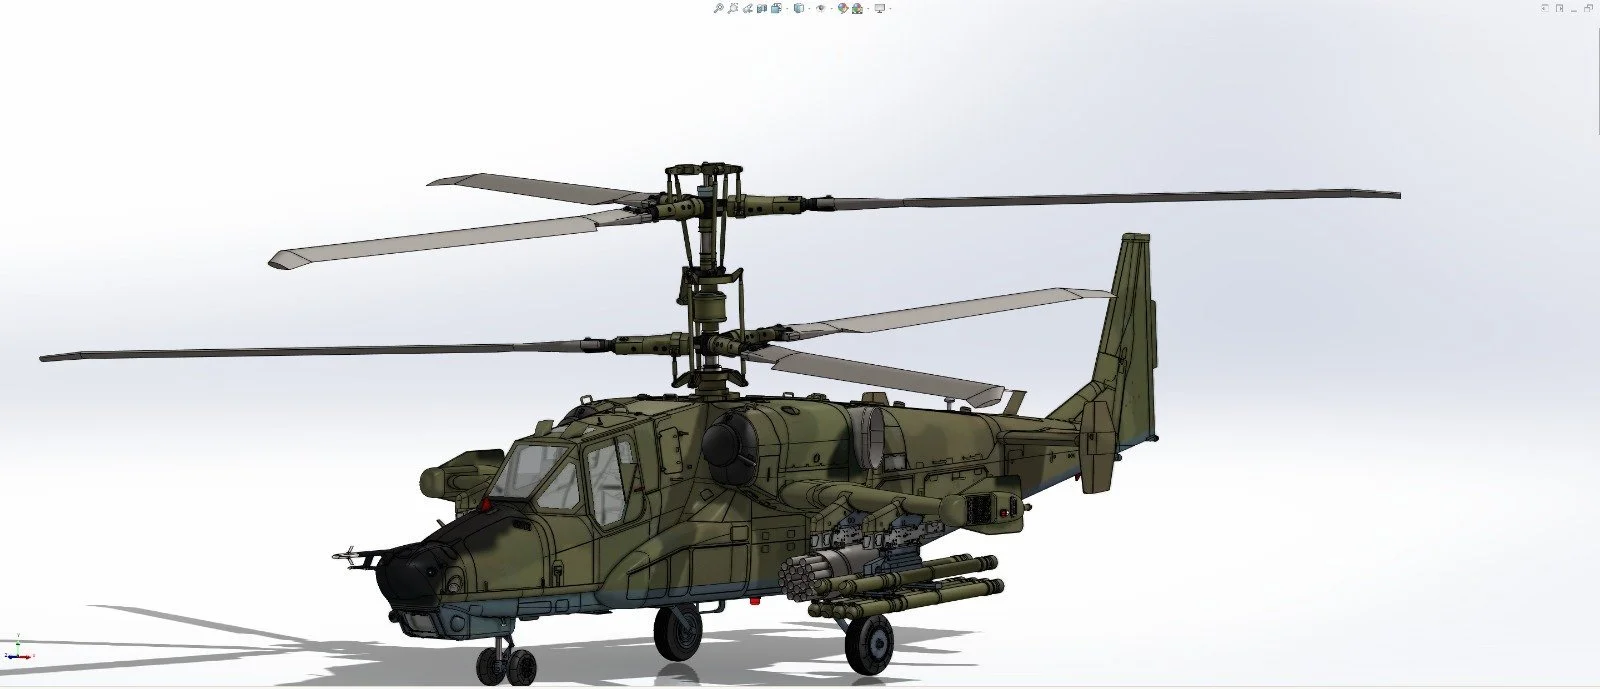
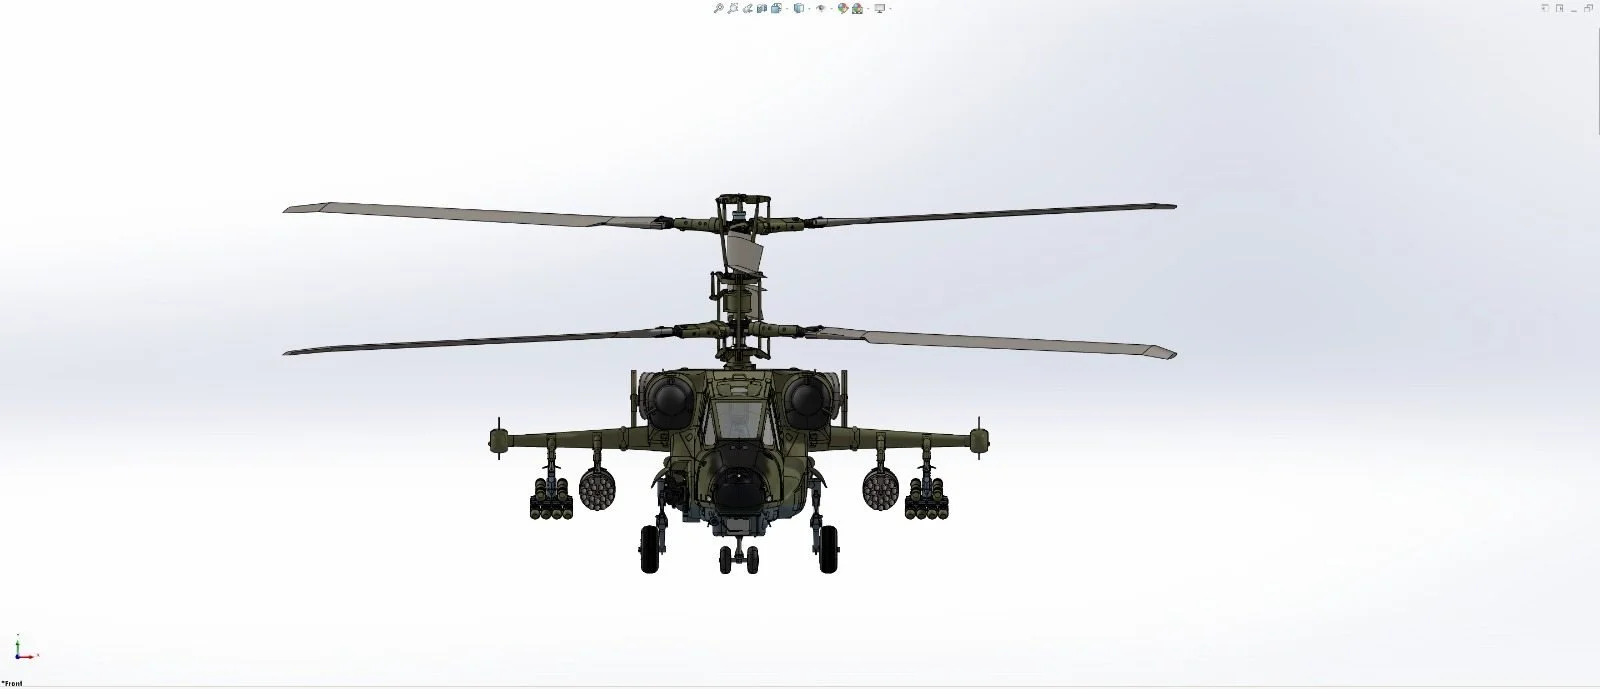
Kamov Ka-50 Build
My Journey: From Kits to Kamov’s

The Building Bug
I’ve been fascinated by aviation, and helicopters in particular, since I was a kid. Like many of us, it started with the classic Airfix and Revell kits. However, the real building bug was fed by years of LEGO—I spent countless hours building and experimenting, which sparked that drive to create things from scratch long before I ever touched a CAD program.
Entering the RC World
I jumped into the RC hobby about 12 years ago, right when RTF foamies and LiPo batteries were becoming accessible. After a while, I graduated to ARTF kits and "pod-and-boom" helis. I’ve always preferred scale and sport flying, but for a long time, the lack of a proper workshop and heavy tools kept me from diving into serious scale builds.
The 3D Printing Evolution
That changed dramatically when consumer 3D printers hit the scene. I started out with an Anycubic Photon and a Mega One before moving to a Prusa MK3S. As I got deeper into the "maker" side of things, I took the plunge into the Voron ecosystem, building my own high-performance machines from the ground up. Today, my workshop has shifted toward high-end reliability and automation; I’ve moved to BambuLab for FDM work and HeyGears for resin, which provides a level of precision that’s a world away from where I started.
The Jump into CAD
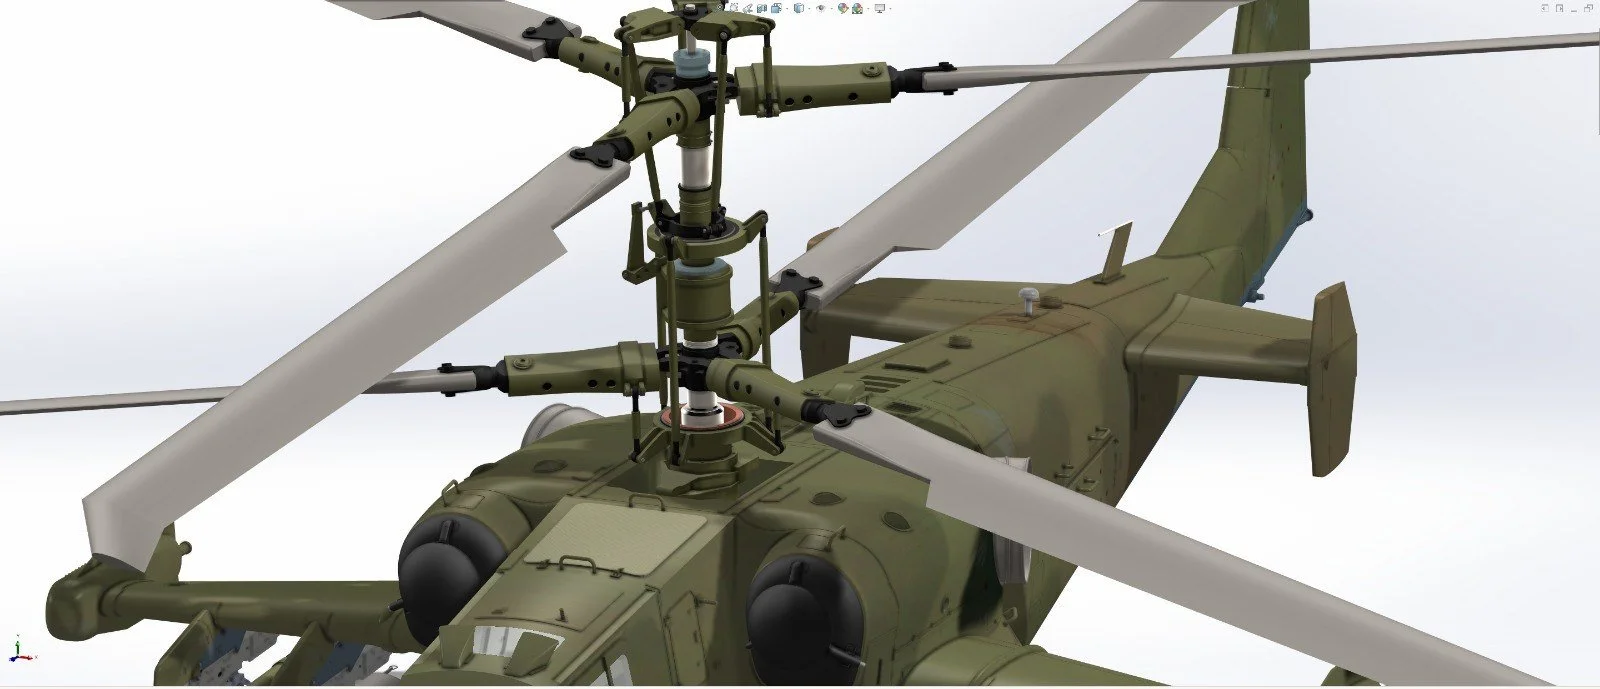
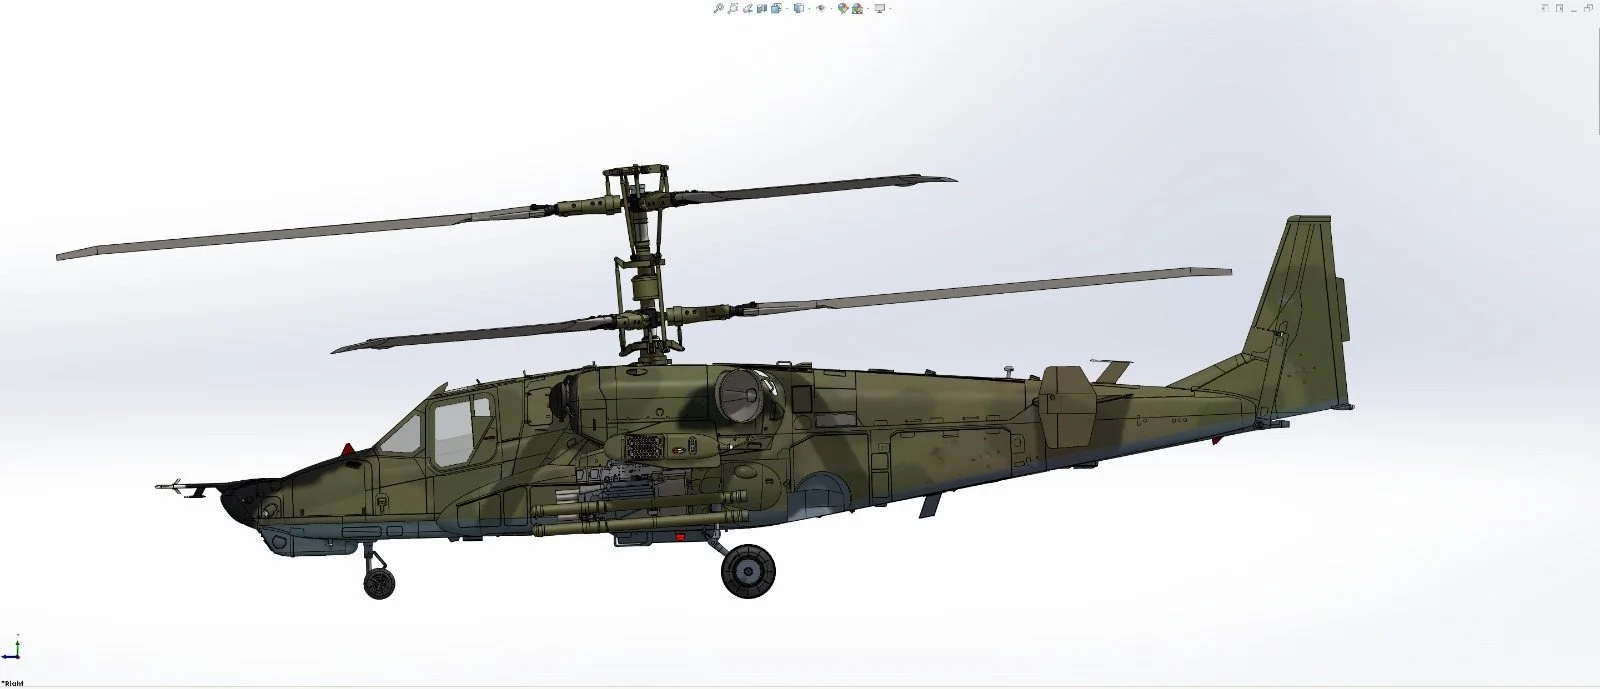
My design journey followed a similar path of "leveling up." I started by designing small scale parts in Fusion 360, but quickly moved on to more ambitious projects like cockpits, weapons, and fuselage segments. Eventually, I decided to jump into the deep end and began designing entire fuselages. To handle that level of complexity, I moved away from Fusion and transitioned to SolidWorks for Makers, which is now my primary tool for full-scale scratch building.
A Bit About Me
In the middle of all this, I finally bit the bullet and earned my PPL(H) license on the Schweizer 300.
Outside of the hobby, I’m a senior software engineer at an investment bank, building high-throughput distributed systems for financial simulations. To keep things balanced, I spend my time hiking, skiing, and doing competitive dance.
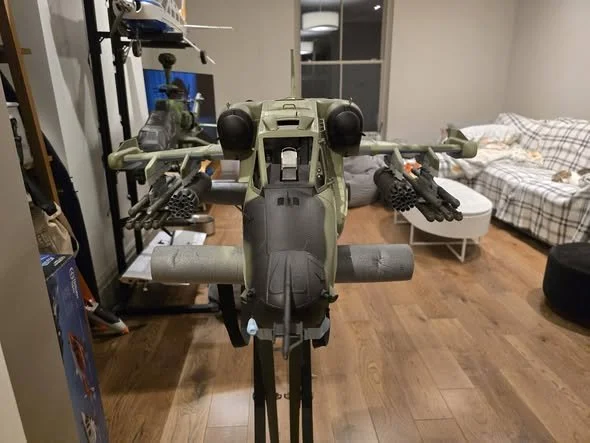
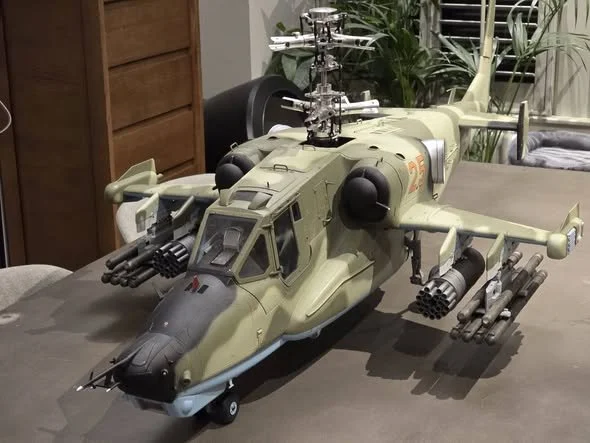
The Current Project: The Kamov
The Kamov is my first true scratch-build and my second detailed scale project. I’m throwing every modern technique I know at this one:
Pure CAD: Every single component is designed in SolidWorks.
Technical Materials: The fuselage is printed in Glass-fibre-enhanced ABS — it’s light, tough, and heat-resistant.
Scale Details: I’m using flexible resins for the fine details and 3D-printed Aluminium for the undercarriage. This allowed me to get the complex scale shapes right without the limitations of a CNC machine.
Custom Code: I designed the electronics and software for the landing gear, lights, and sound FX from scratch. I even used Agentic AI tools to help streamline the microcontroller firmware.
26 Feb 2026
First test flight of the CTX-5FBL mechanics Spend good 1-1.5h on the field tweaking the swashplate linkages to get the neutral torque momentum from both of the sets of the rotor disk blades. After that - some time spend tweaking in the swashplate phasing to remove any oscillations and get the right response to roll/elevator input. First flights done on 425mm blades, I am waiting for the arrival of the 515mm ones that will go into the model to get the right 1:10 look. Headspeed running at 1250 RPM Kontronik Pyro 600-11 Motor Kontronik Kolibri 90LV ESC KST servos BD Axon FBL
https://youtu.be/DxZNwu6CqmI?si=hj5FYICBeMFxitgD
3D printed and assembled the prototype of Kamov KA-50 undercarriage retractable mains which I designed - this is for 1:10 RC helicopter model I am building.
Printed in H2D with Bambulab ABS-GF, used breakaway supports - this was to print the parts in orientation optimized for strength.
And they work - bonus - I did also a load test, and applying 3kg of force, the retracts spring mechanism worked as expected and the parts did not deform in any way.
Model will be 6kg (2kg per retract) so there is a chance that 3d printed parts will be sufficient and I will not have to order CNC milled ones.
https://youtu.be/2iFBcWF54_0?si=EFDvRsW9hM8HoK7l
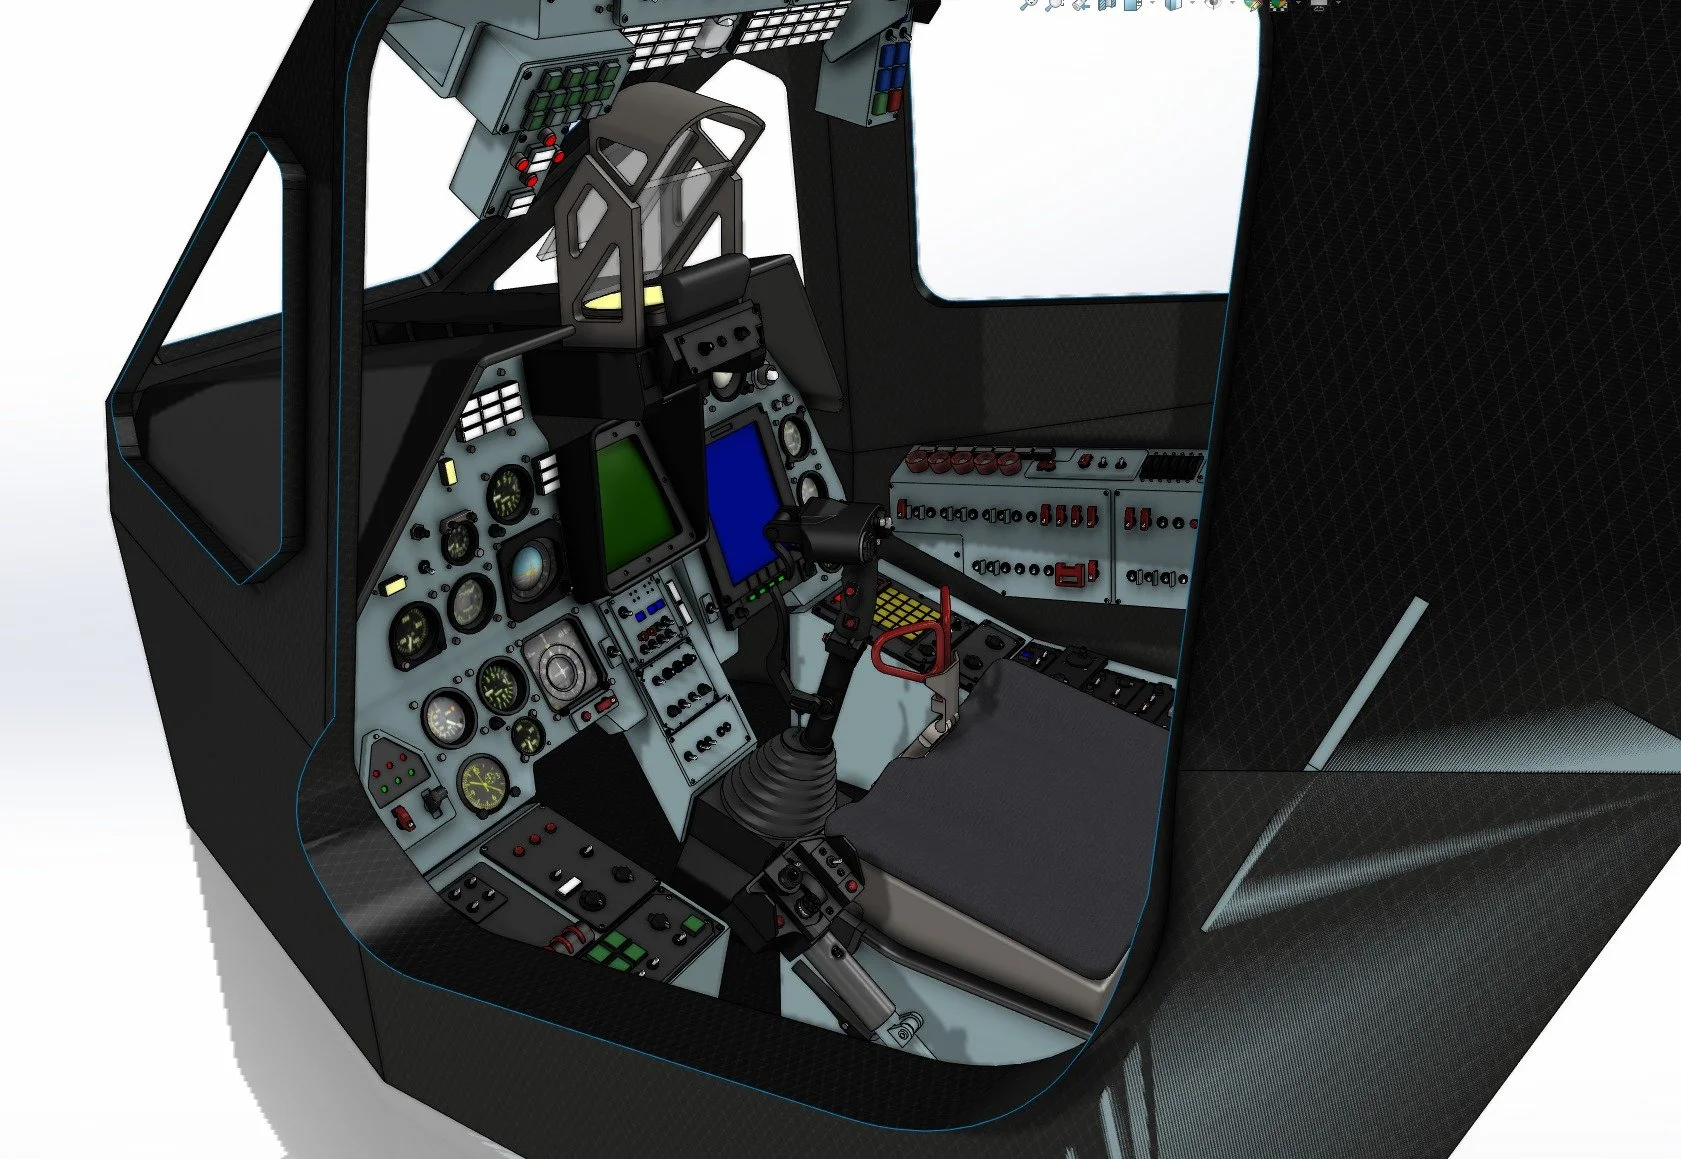
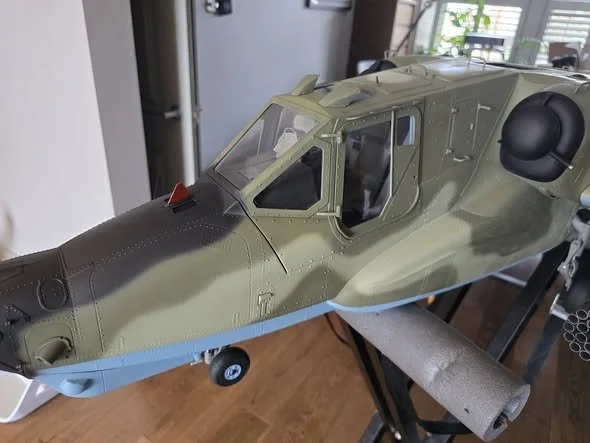
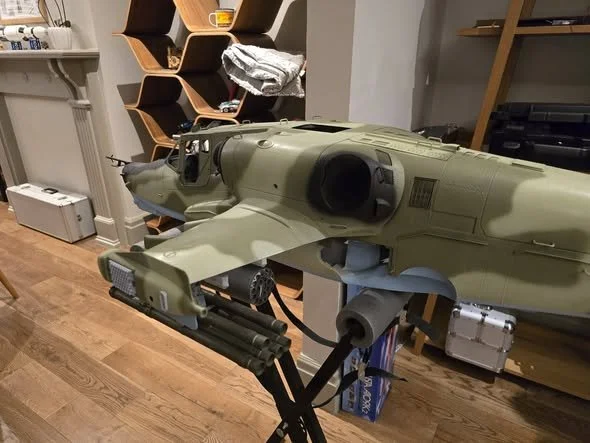
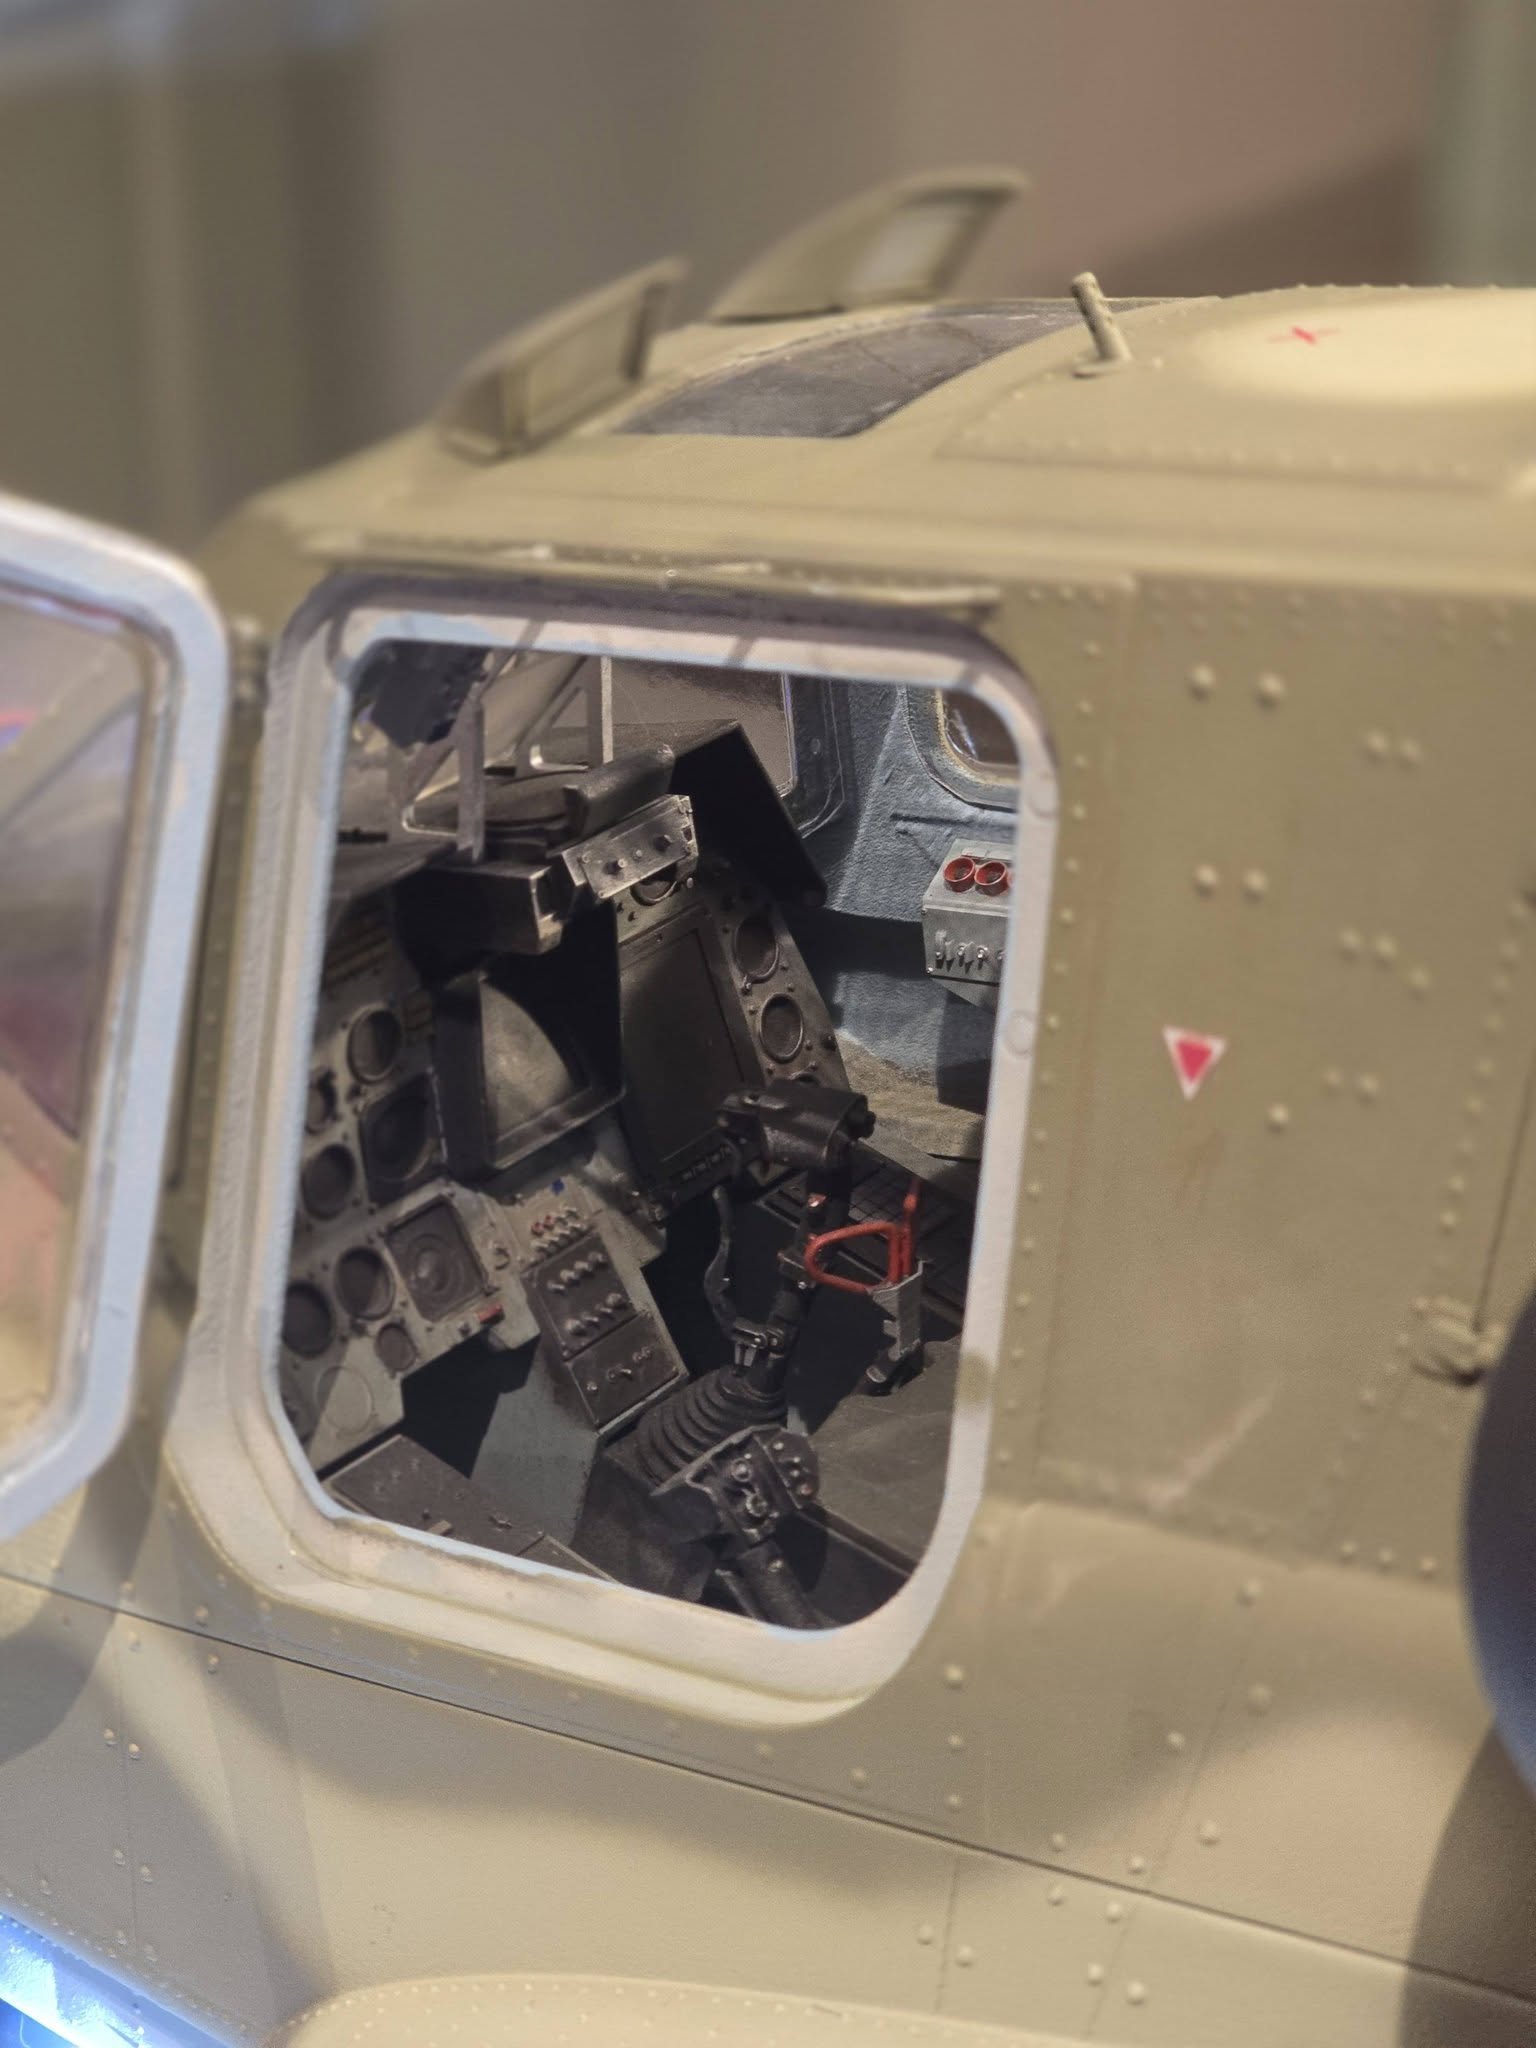
Kamov KA-50 design, almost on the finish line - only the cockpit remaining
Youtube video of finished rendered model
https://youtu.be/YtOjqwnYT-A?si=fN5feMpglwVVBZz3
Kamov KA-50 c
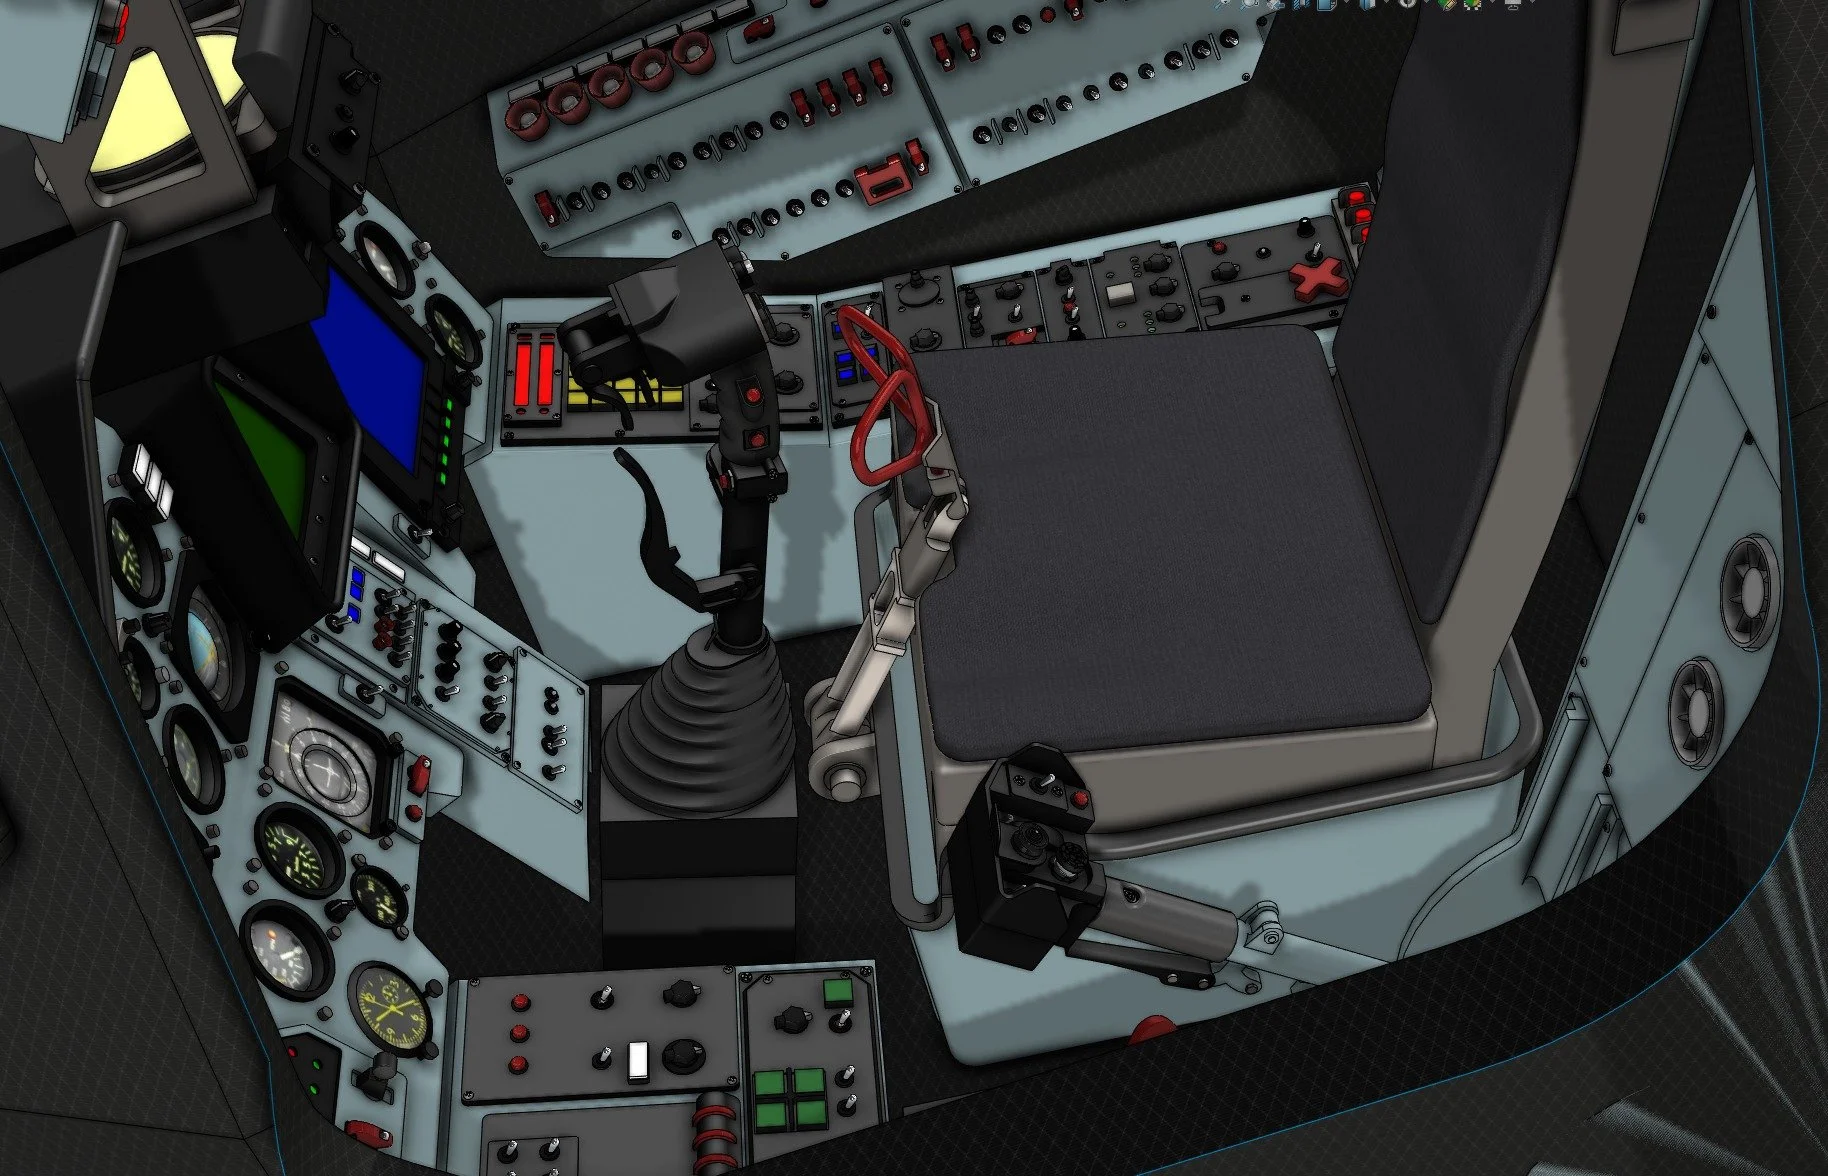
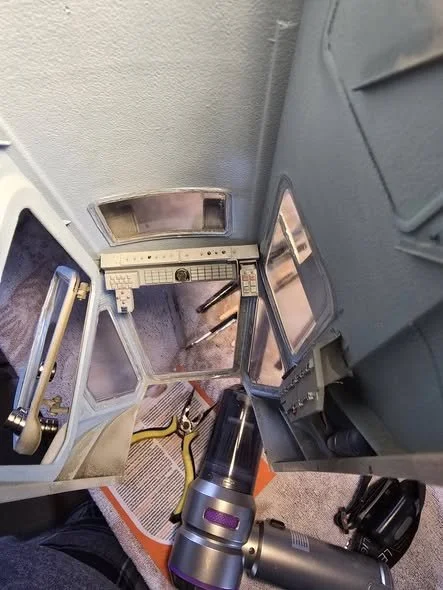
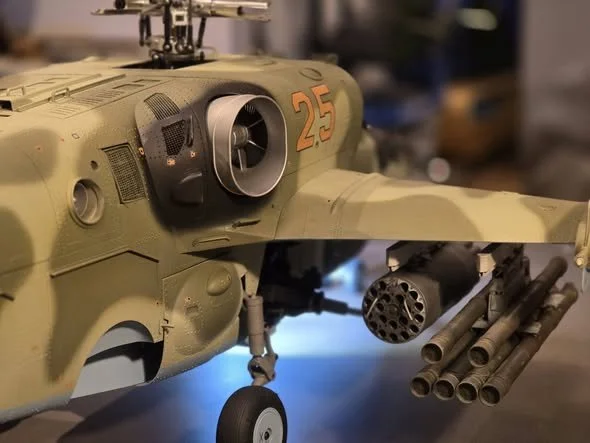
cockpit almost done; most detailed one I did so far
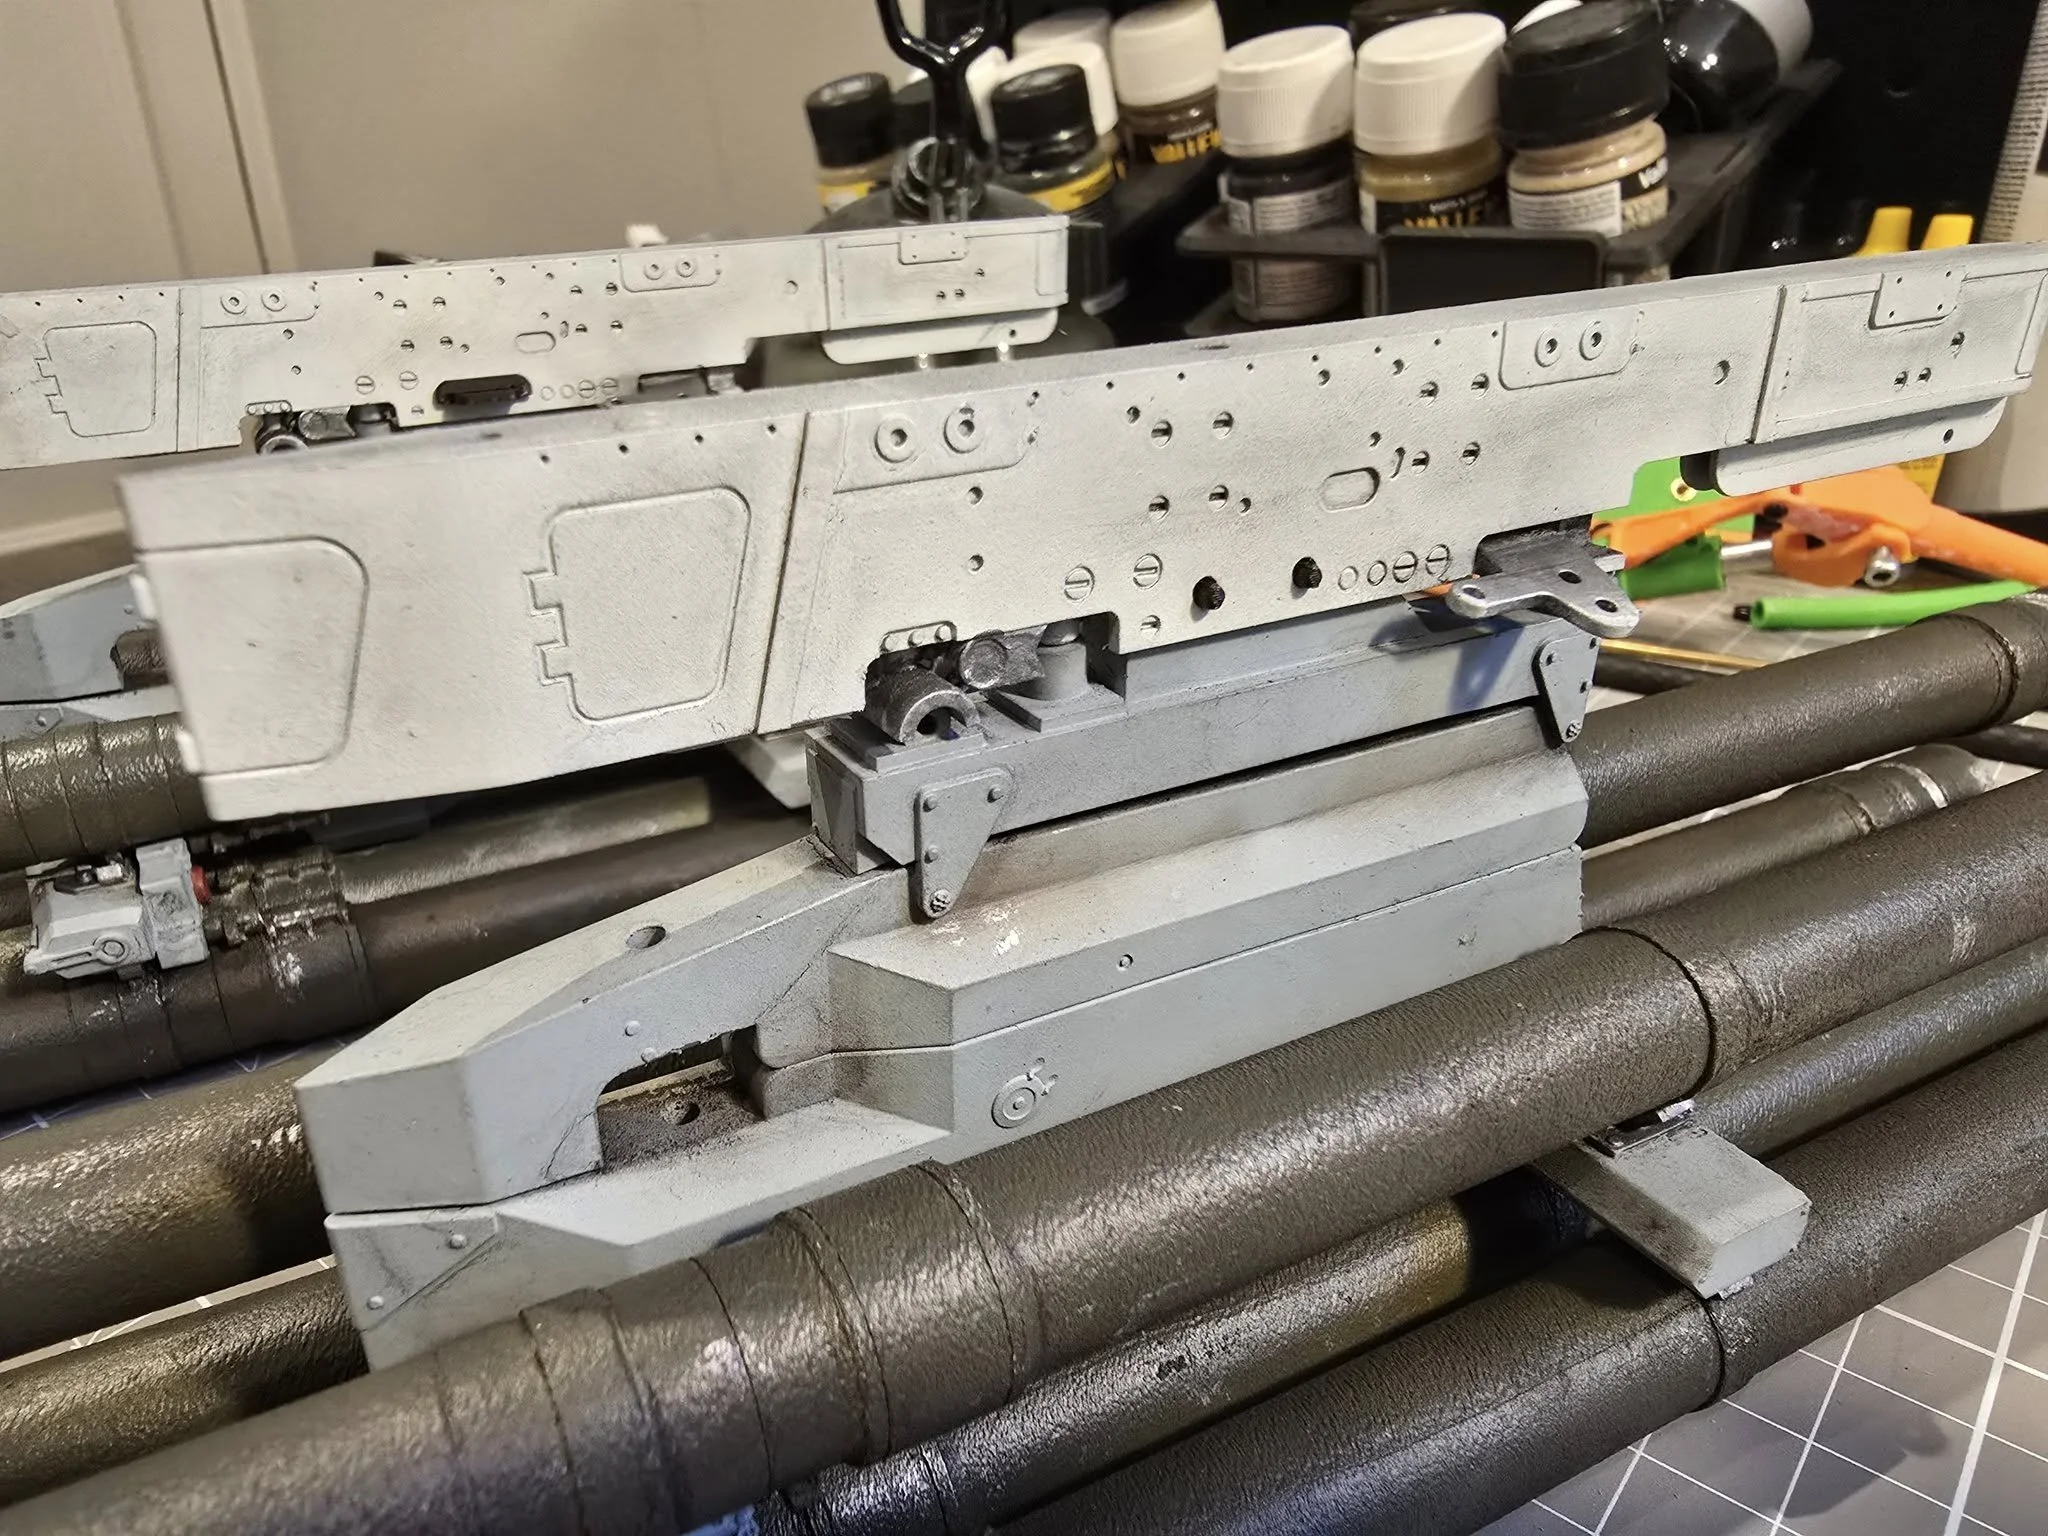
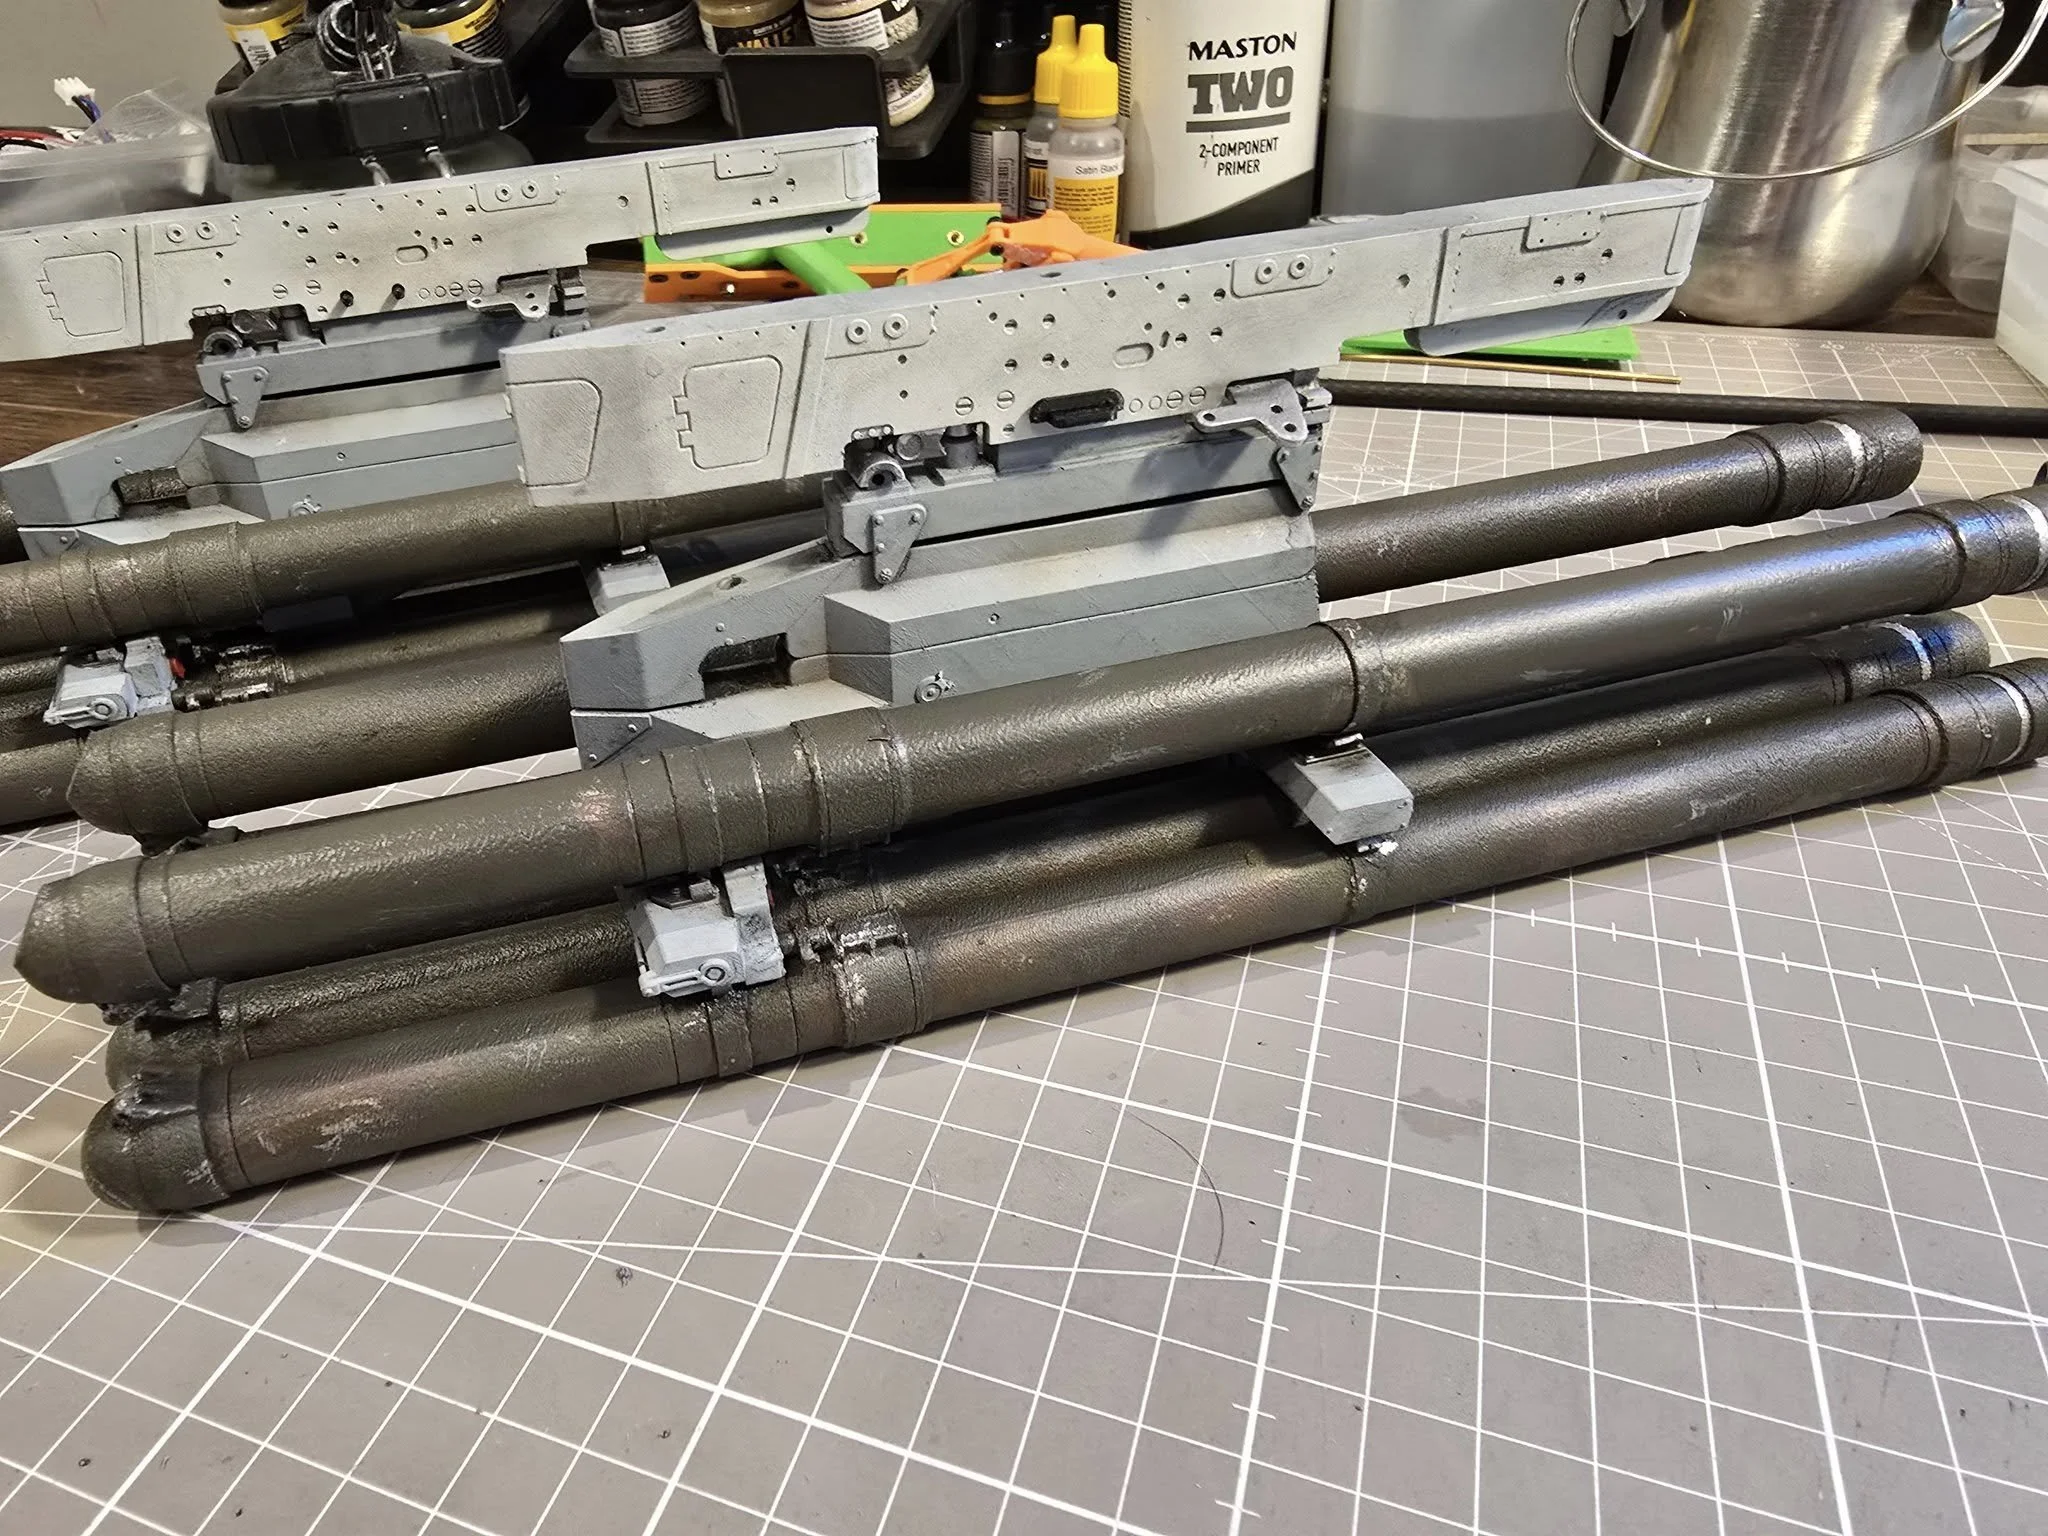
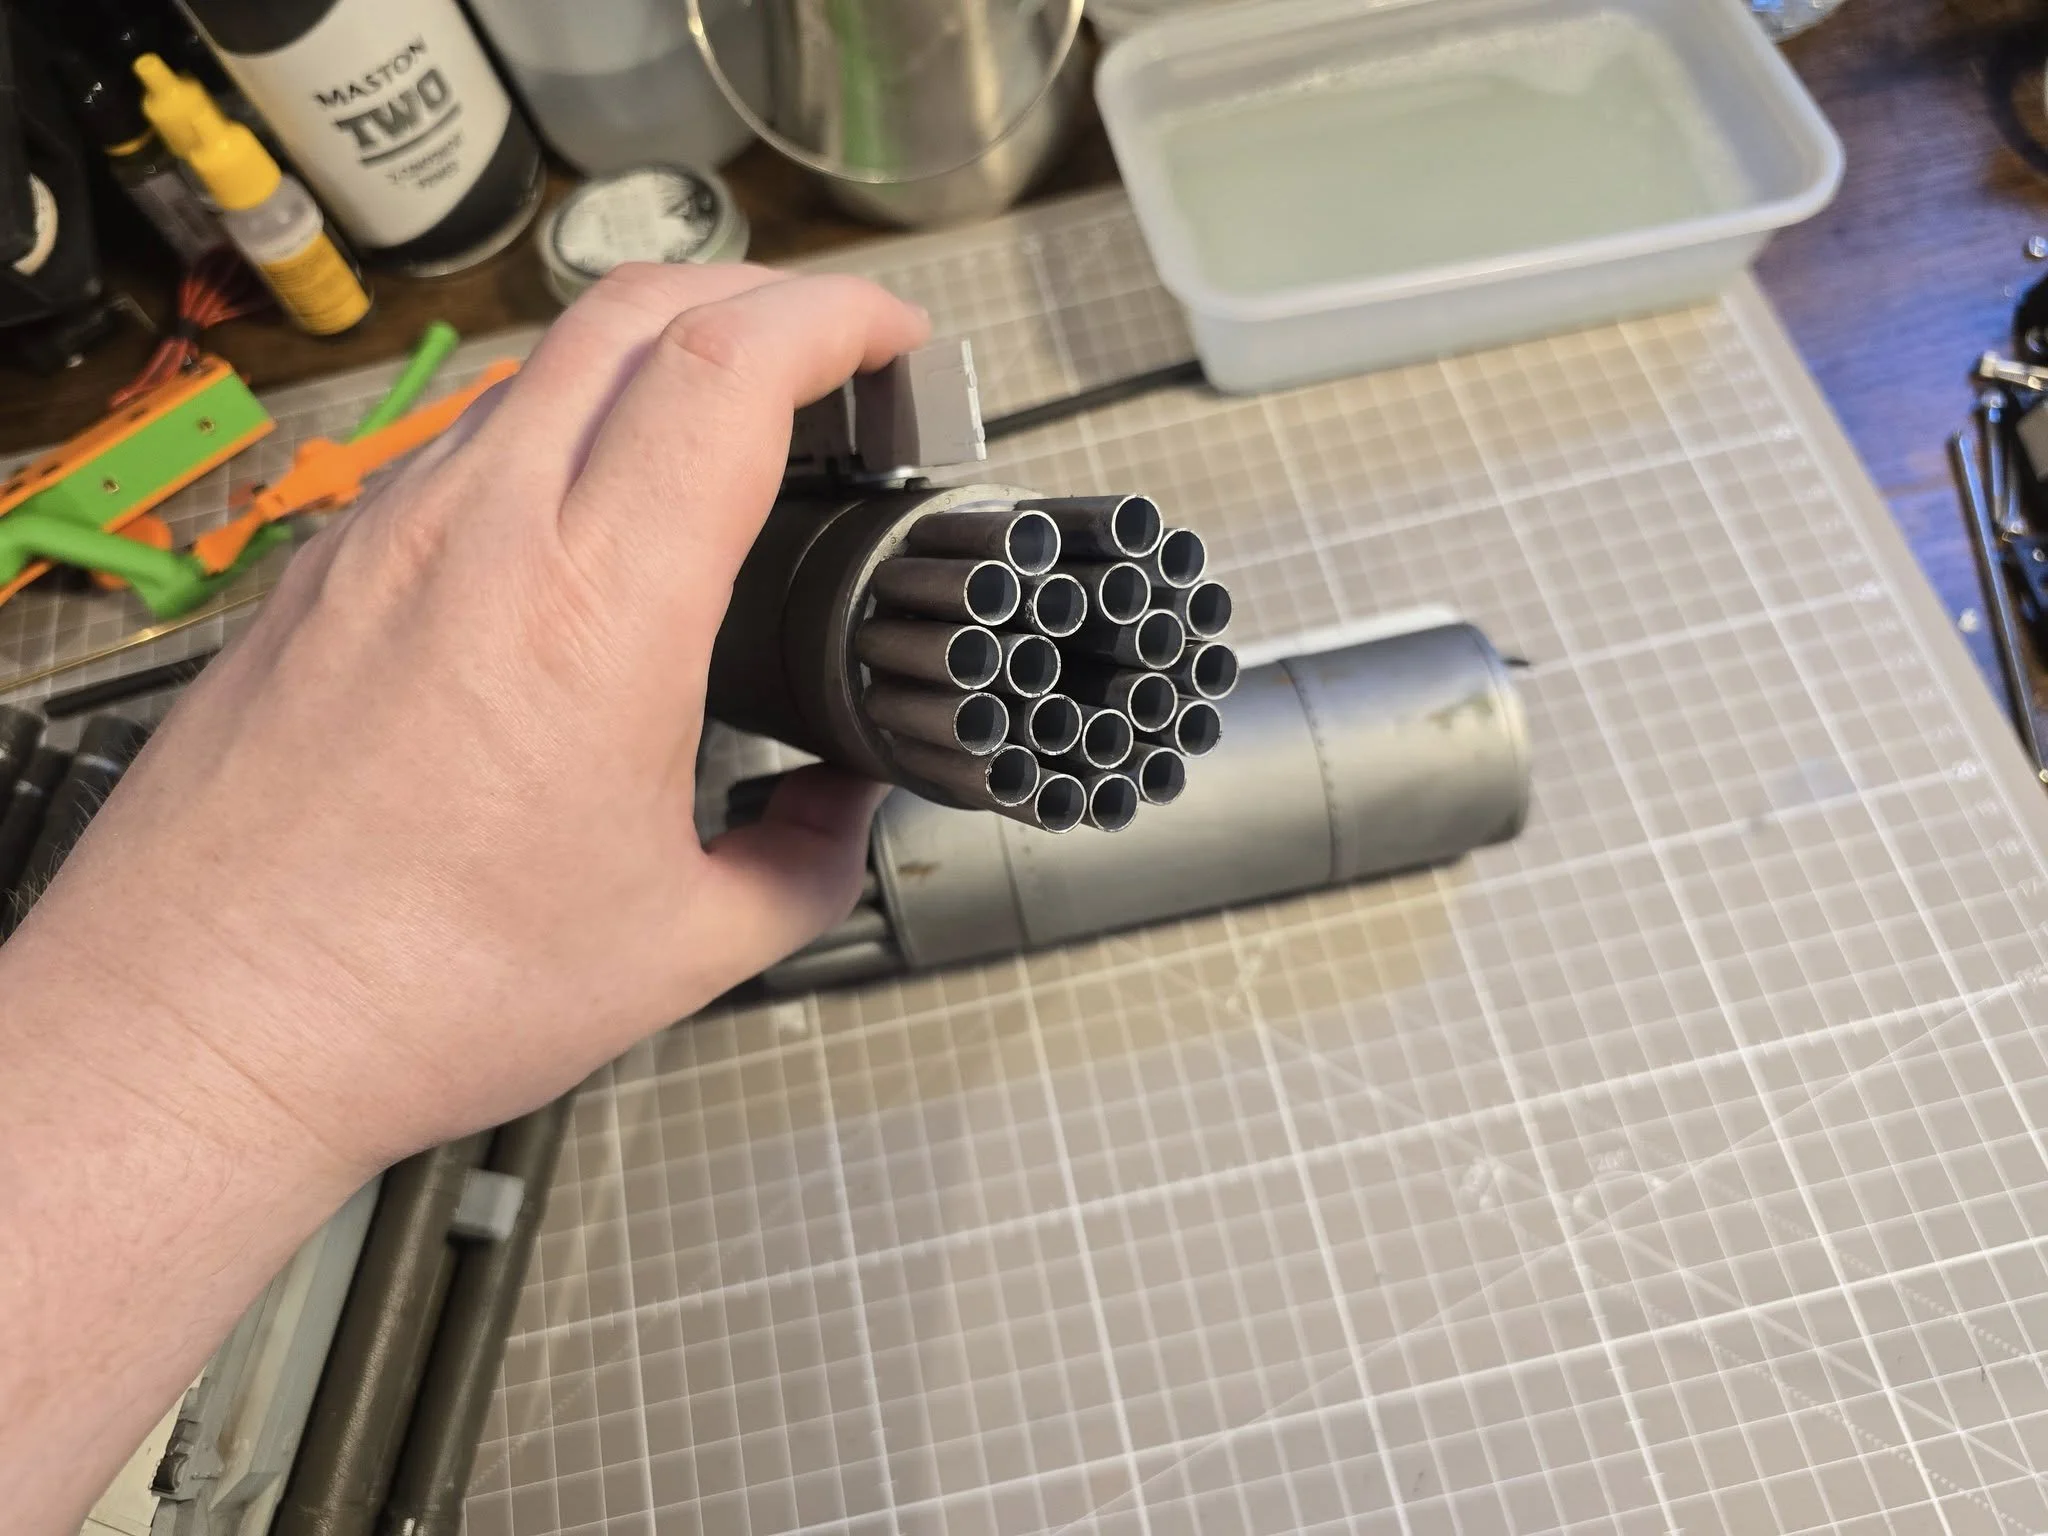
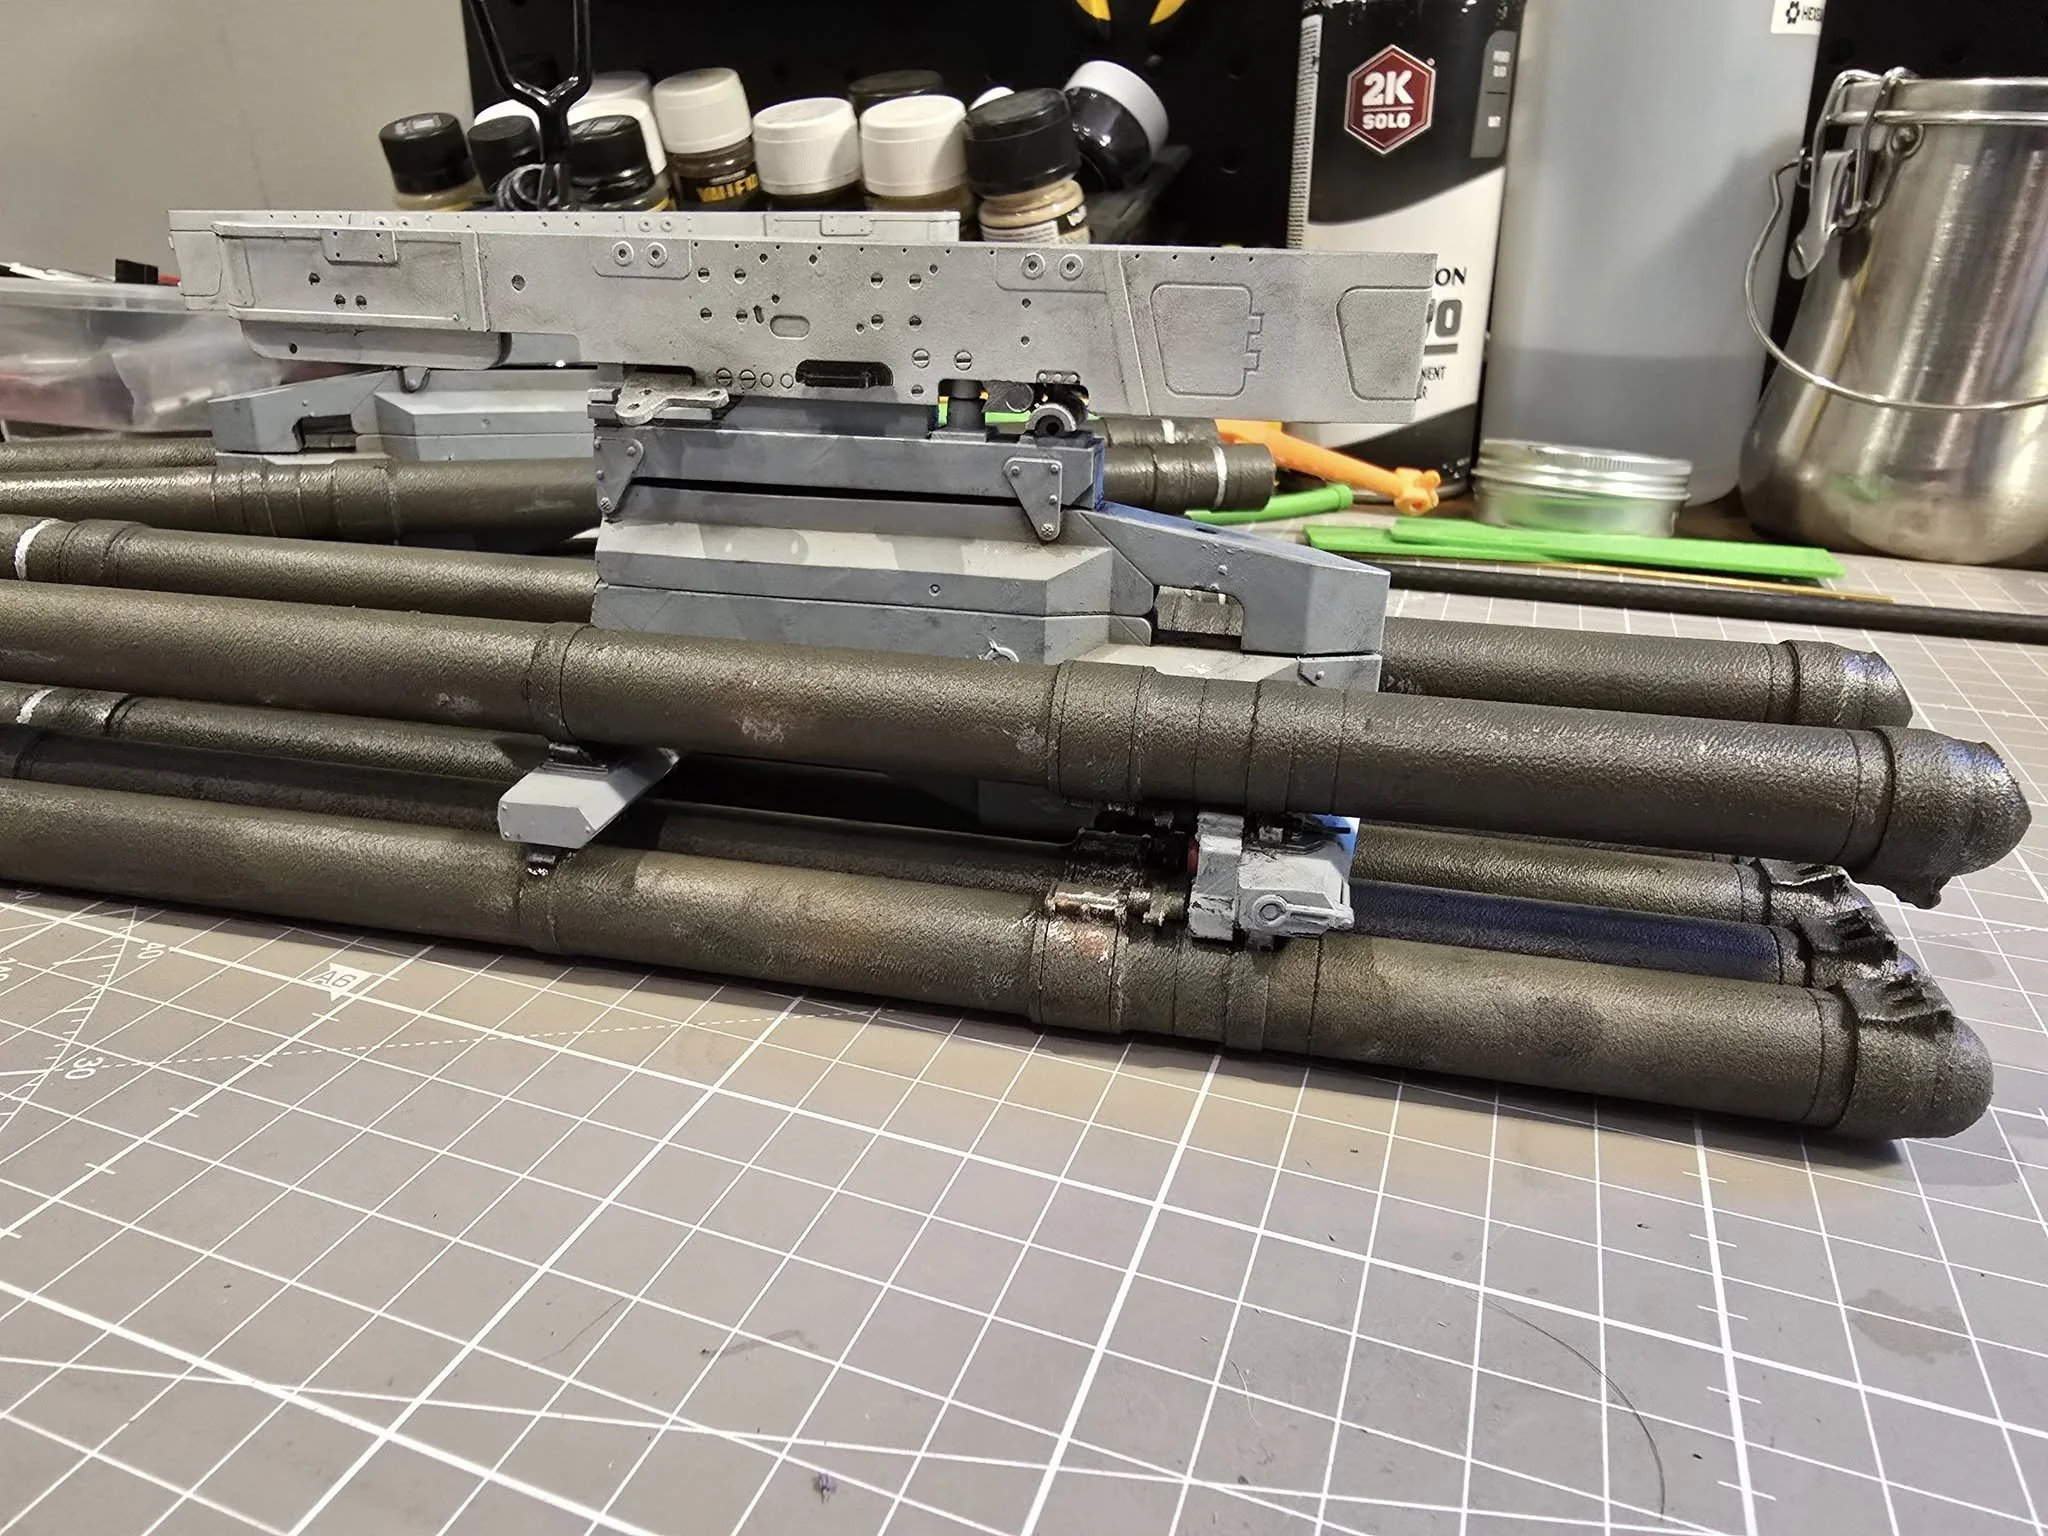
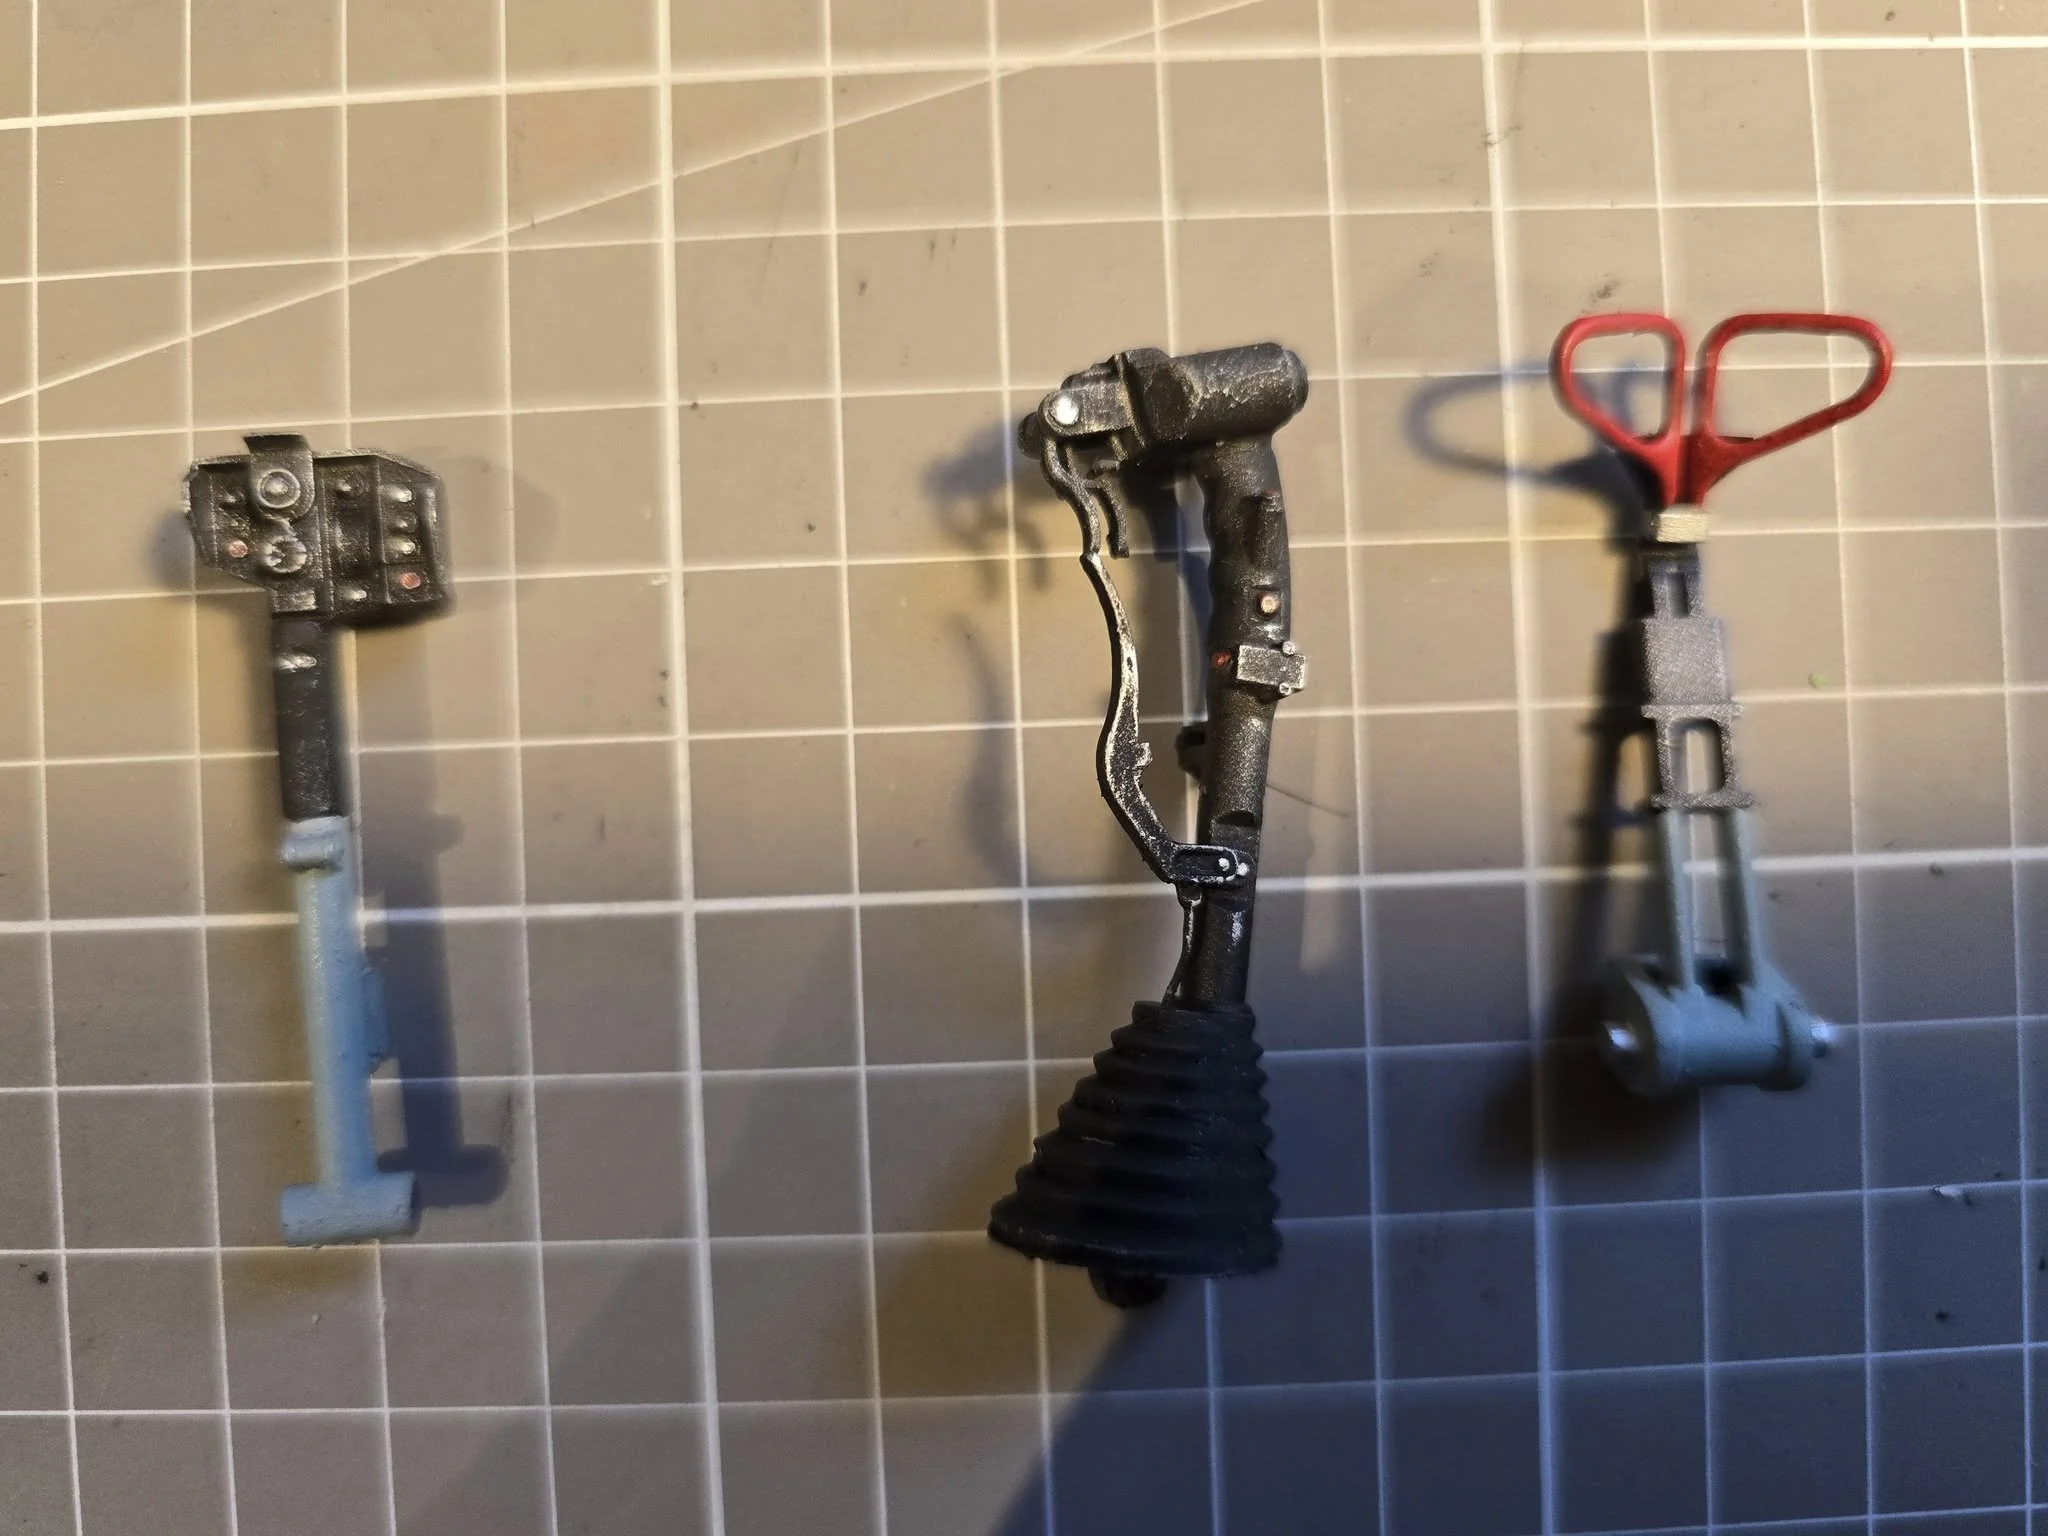
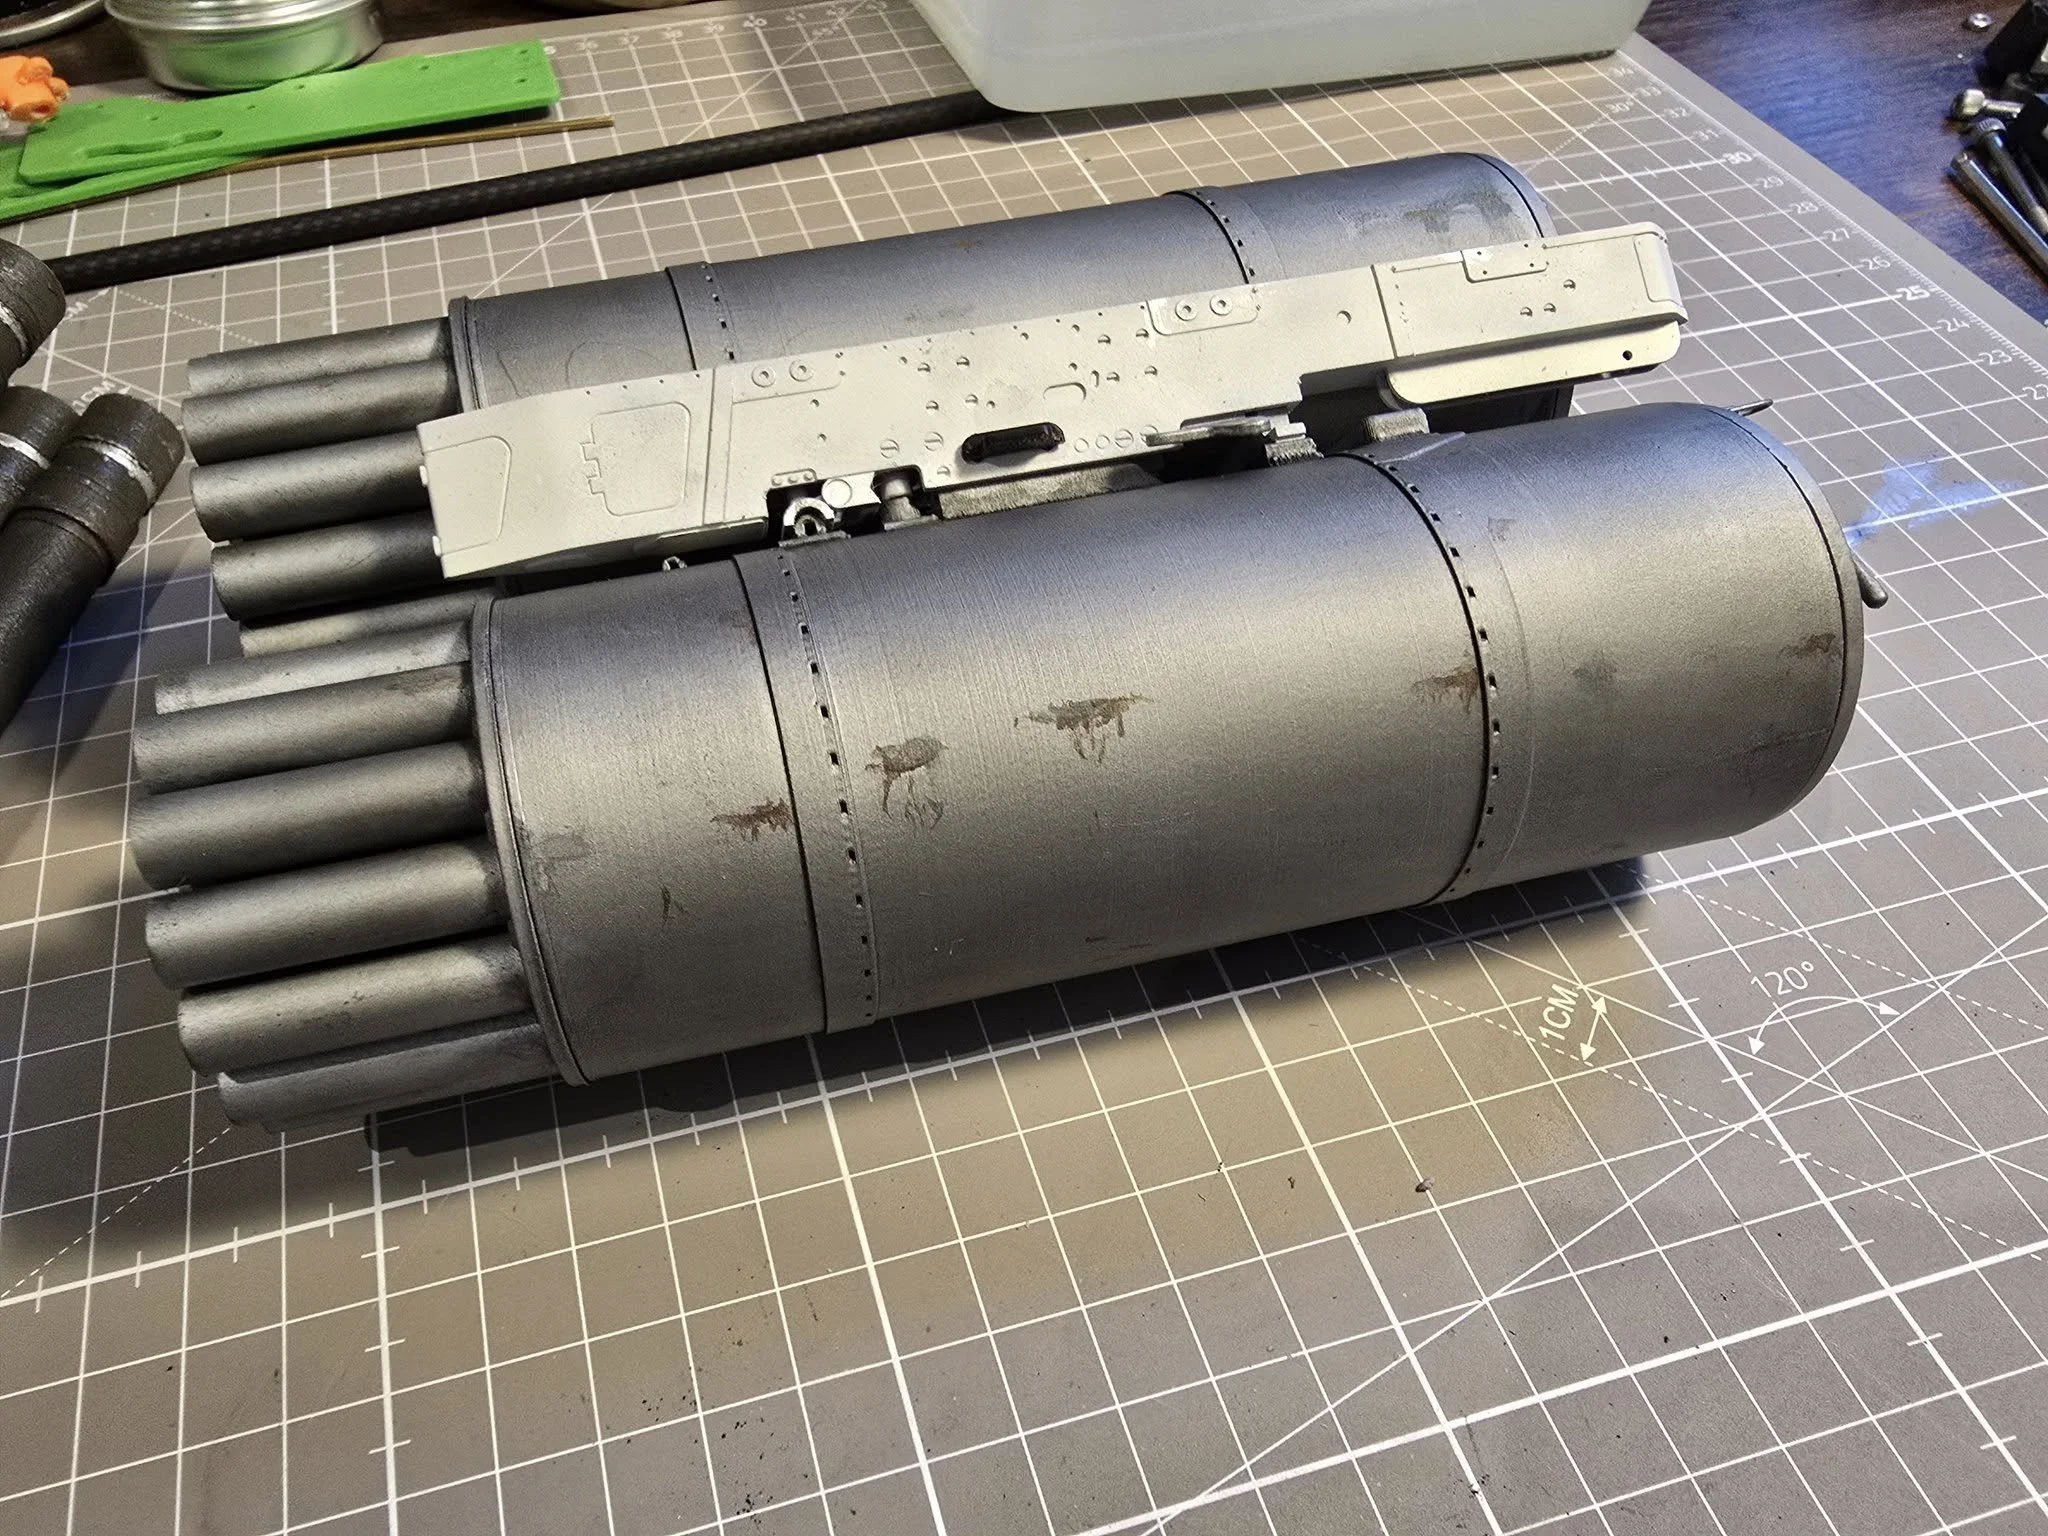
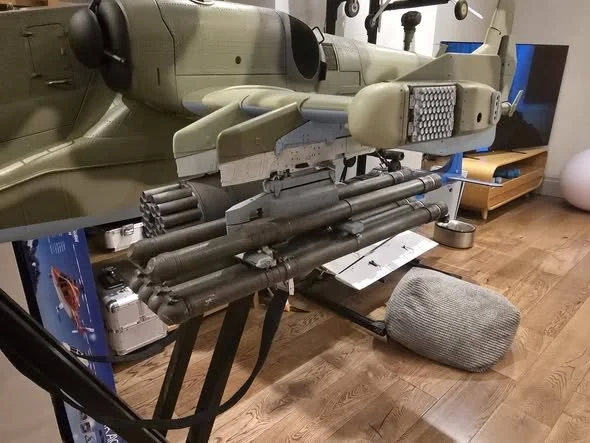
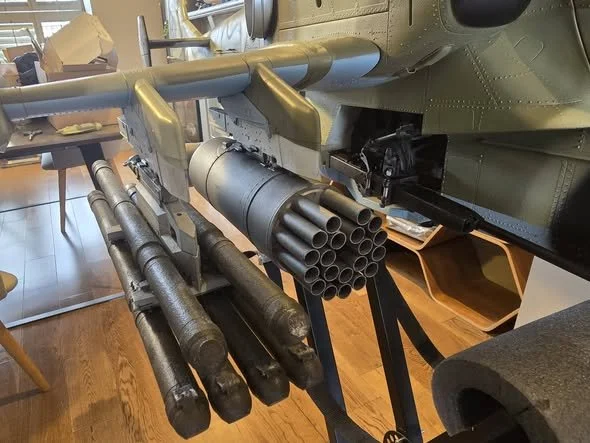
Wanted to have some fun with painting - so while I'm prototyping the fuselage of Kamov - printed and painted weapons for it. My design.


28th Feb 2026
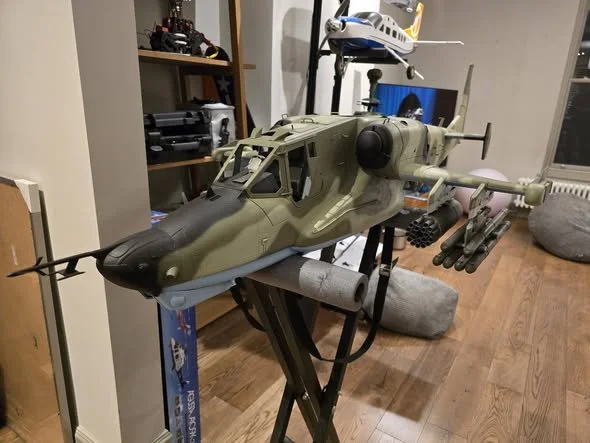
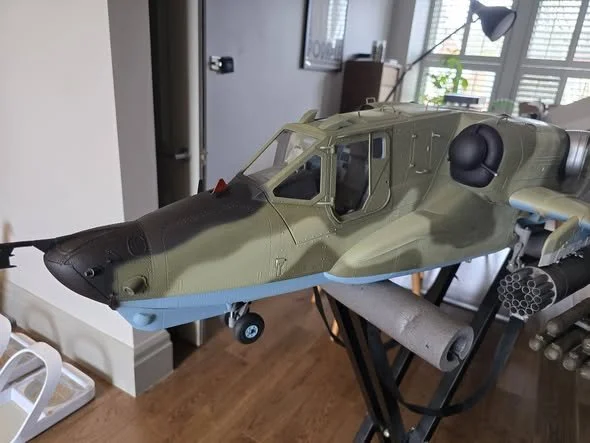
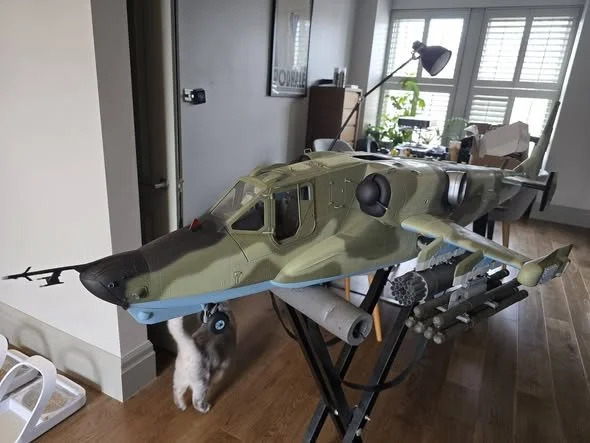
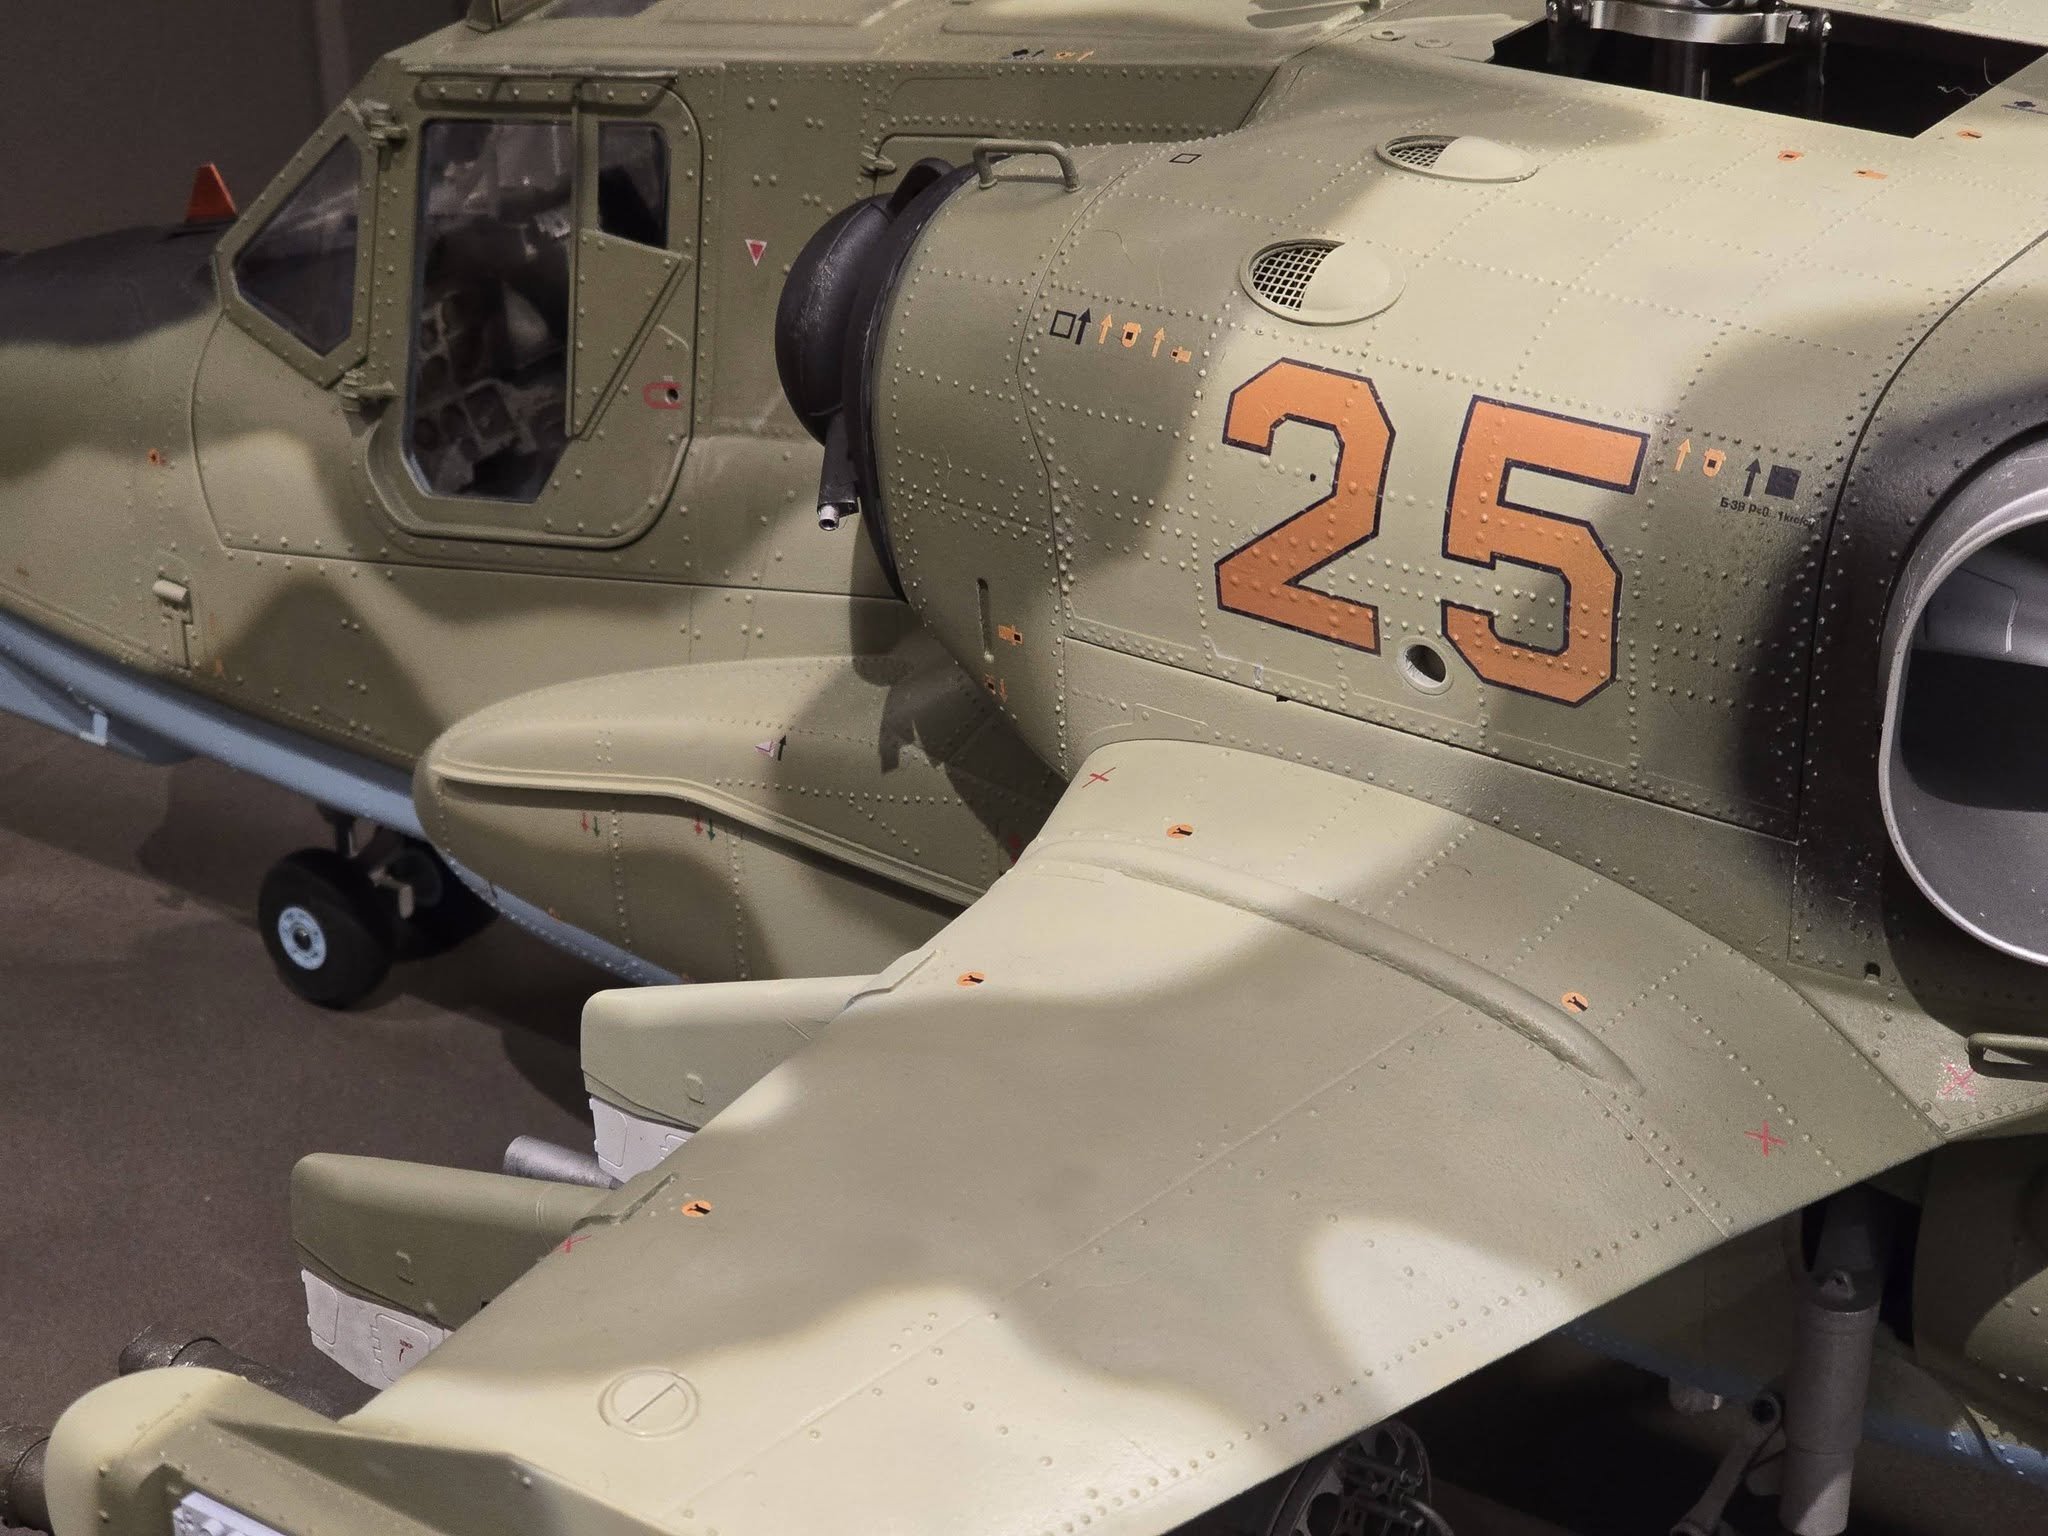
Kamov KA-50 1/10 – Work in Progress update
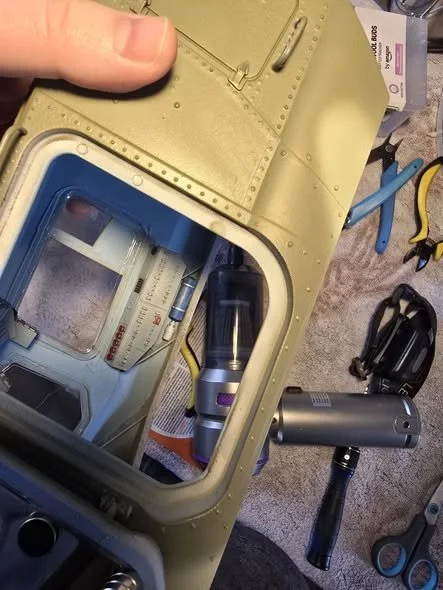
Painting done. Now will paint small details and wait for decals. In meantime install lights.
This is my own design done in CAD, fuselage is fully 3d printed in ABS-GF. So are all the accessories and scale parts, cockpit etc.
Current weight - fuselage + cockpit + weapons is at 1.6kg.
The undercarriage will add another 300g (I will be ordering another set that is more weight optimised). Remaining fittings another 200g.
Sound system will add another 150.
I'm aiming to keep the weight at under 6.5kg.


1 March 2026
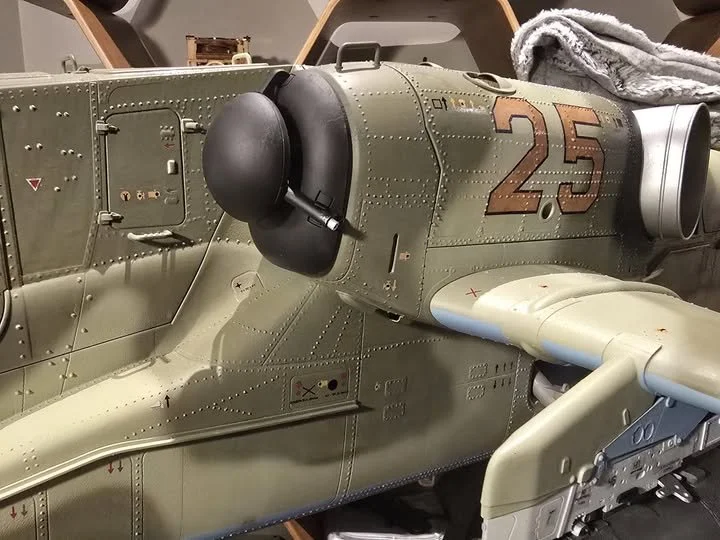
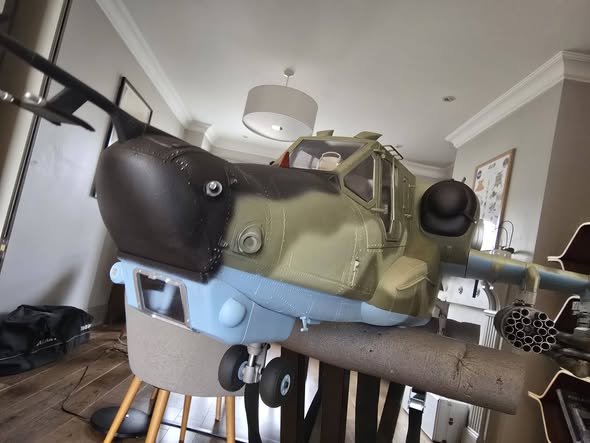
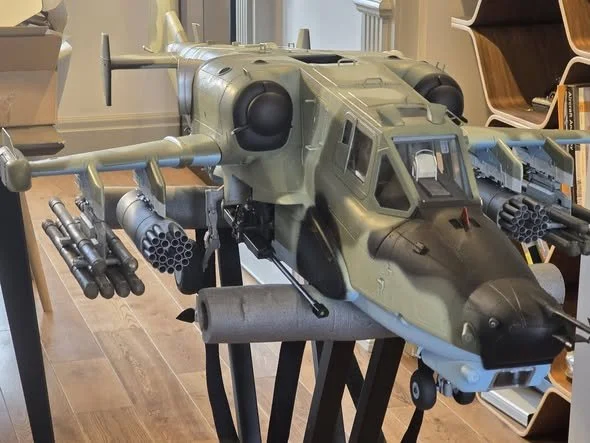
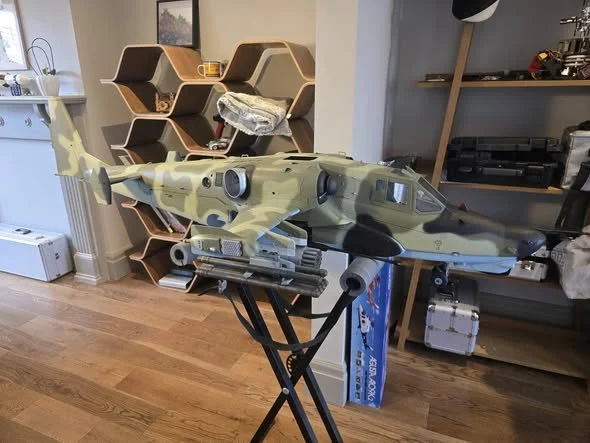
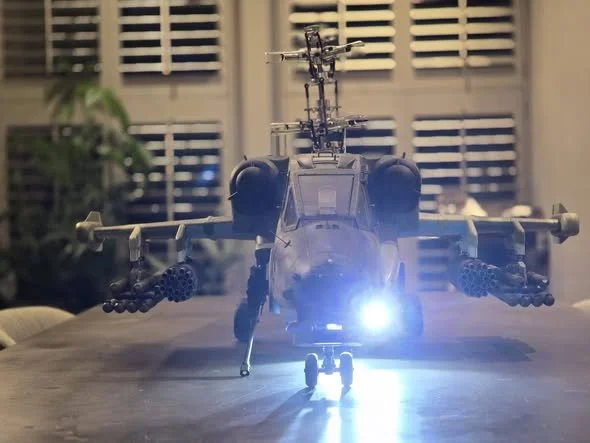
Painting, decals and light system installed.
It's done... Well need to finalise the custom electornics and some weathering is needed but happy with the result so far.


6th March 2026
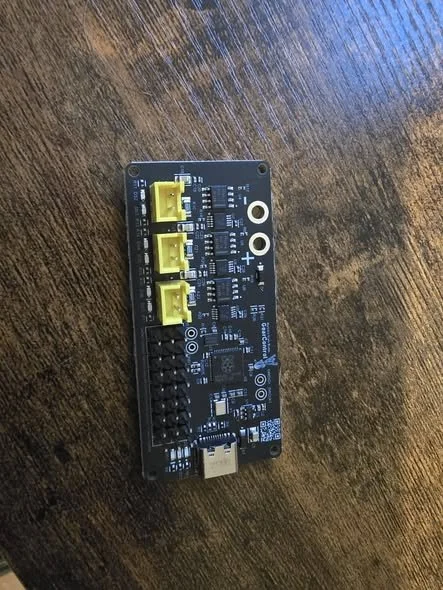
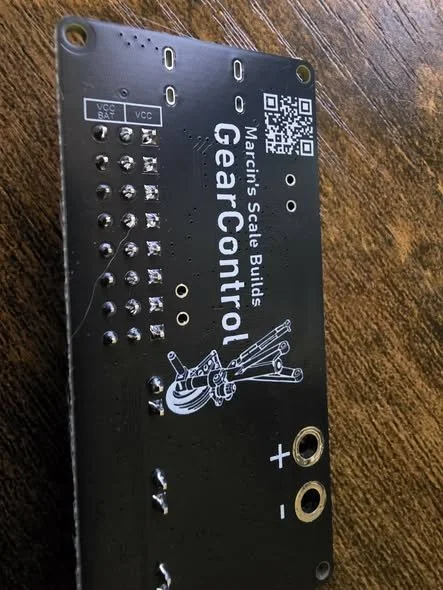
Custom undercarriage controller and sequencer designed and programmed by yours truly
3 undercarriage channels, 2 servos per channel for undercarriage door.
Supports mode:
Open doors - deploy
Open doors - deploy - close doors
And vice versa
It tracks state of doors and Undercarriage so each phase is executed only when previous one is finished.
Each channel can act independently or in synchronous mode ie.
All doors open - all undercarriage finishes deploying - all doors close
The door sequence can also be configured
Ie both doors in channel open at the same time, in sequence or with delay (helpful for jets)
Ofcourse the door servos speed/accel and limits are configurable.
This will go into my Kamov as a demonstrator.
Undercarriage battery and motors support up to 24V. Servos powered either from the battery (2S recommend) or 5V - jumper configuration.
The controller also supports emergency landing gear deployment if the battery voltage goes down.
I wrote all of the firmware with assistance of Claude Opus 4.6 agentic AI.
PCB was fabricated at jlcpcb based on custom design.
The tooling and capabilities available now are amazing
Wouldn't image a couple of years back I would be designing and building custom electronics for my RC models (or custom fuselages for that matter)